- Item Name : Tucker - Equestrian & Horse Riding Club WordPress Theme
- Author : ThemeShala
- Support : https://support.themeshala.com/
Getting Started
Welcome to Tucker.
Tucker is a clean modern cinema, movie director, film studio and filmmaker websites. The theme features layouts designed specifically for presenting movies, videos, film maker, director, poster and festival layouts. You will get individual unique pages, such as about, gallery, blog, services, and contact.
Requirements
You need at least WordPress version 6.0+ installed for this theme to work properly. It is strongly recommended that you always use the latest stable version of Wordpress to ensure all known bugs and security issues are fixed. Other requirements:
- PHP version 8.0 or greater . But for maximum speed gain we recommend you to use PHP version 8.1+.
- MySQL version 5.6 or greater OR MariaDB version 10.0 or greater.
- WordPress memory limit of 128 MB or greater.
Server Requirements: https://make.wordpress.org/hosting/handbook/handbook/server-environment
PHP Configuration For Hosting Server
Use this code For the Elementor Editing and Demo Import Problem in your PHP configuration file on the hosting Server.
- max_execution_time = 1000
- max_input_time = 600
- max_input_vars = 1000
- memory_limit = 512M
- post_max_size = 512M
- upload_max_filesize = 512M
What's Included
After purchasing Tucker theme on ThemeForest with your Envato Account, go to your Download page. You can choose to download Tucker theme only (Installable WordPress Theme) or the entire Tucker theme package.
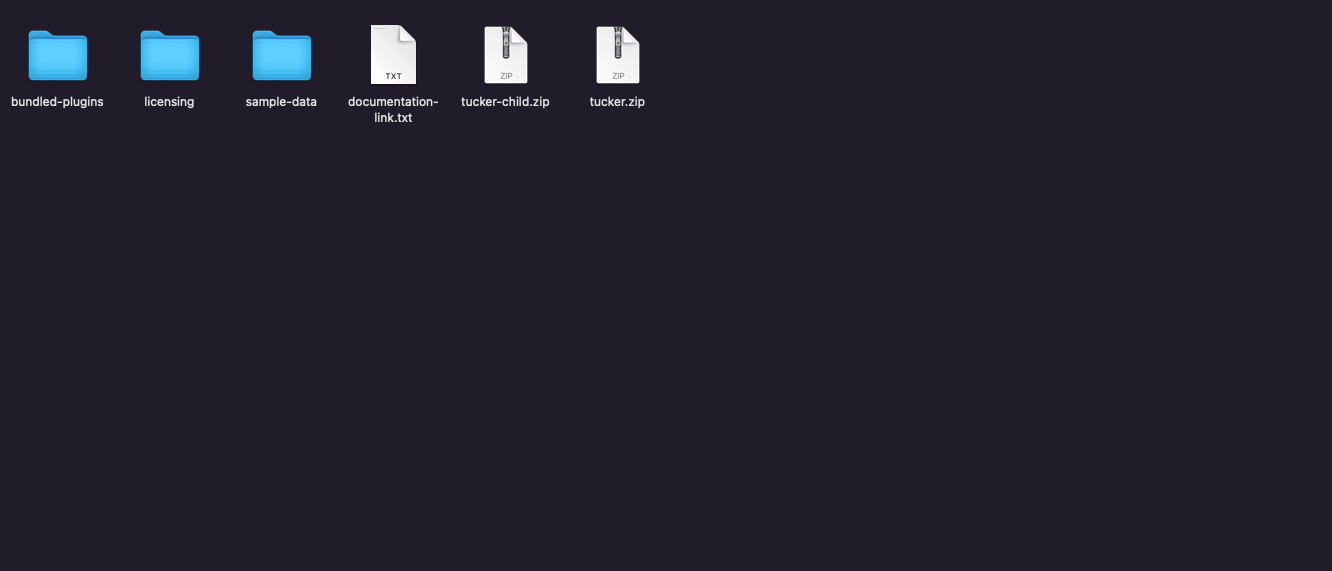
- tucker.zip: An Installable WordPress Theme zip file.
- tucker-child.zip: A child-theme zip file and a readme.txt note about the child-theme.
- bundled-plugins: This folder contains required plugins to work with our theme.
- sample-data: This folder contains required plugins to work with our theme.
- licensing: This folder contains the terms and conditions of the license
- documentation-link.txt: This file contains online documentation link for tucker.
Theme Installation
Important! if you download the package file from ThemeForest and try to upload it to your WordPress, you will face this error: Theme is missing the style.css stylesheet. Please make sure you unzipped the package and are uploading the correct file to your WordPress.
Please follow the instructions in the video to see how you can install WordPress on your hosting:
- For local host: https://www.youtube.com/watch?v=snFzbPm_RUE
- For cPanel: https://www.youtube.com/watch?v=t-YBqV2ReR0
Using Theme Uploader
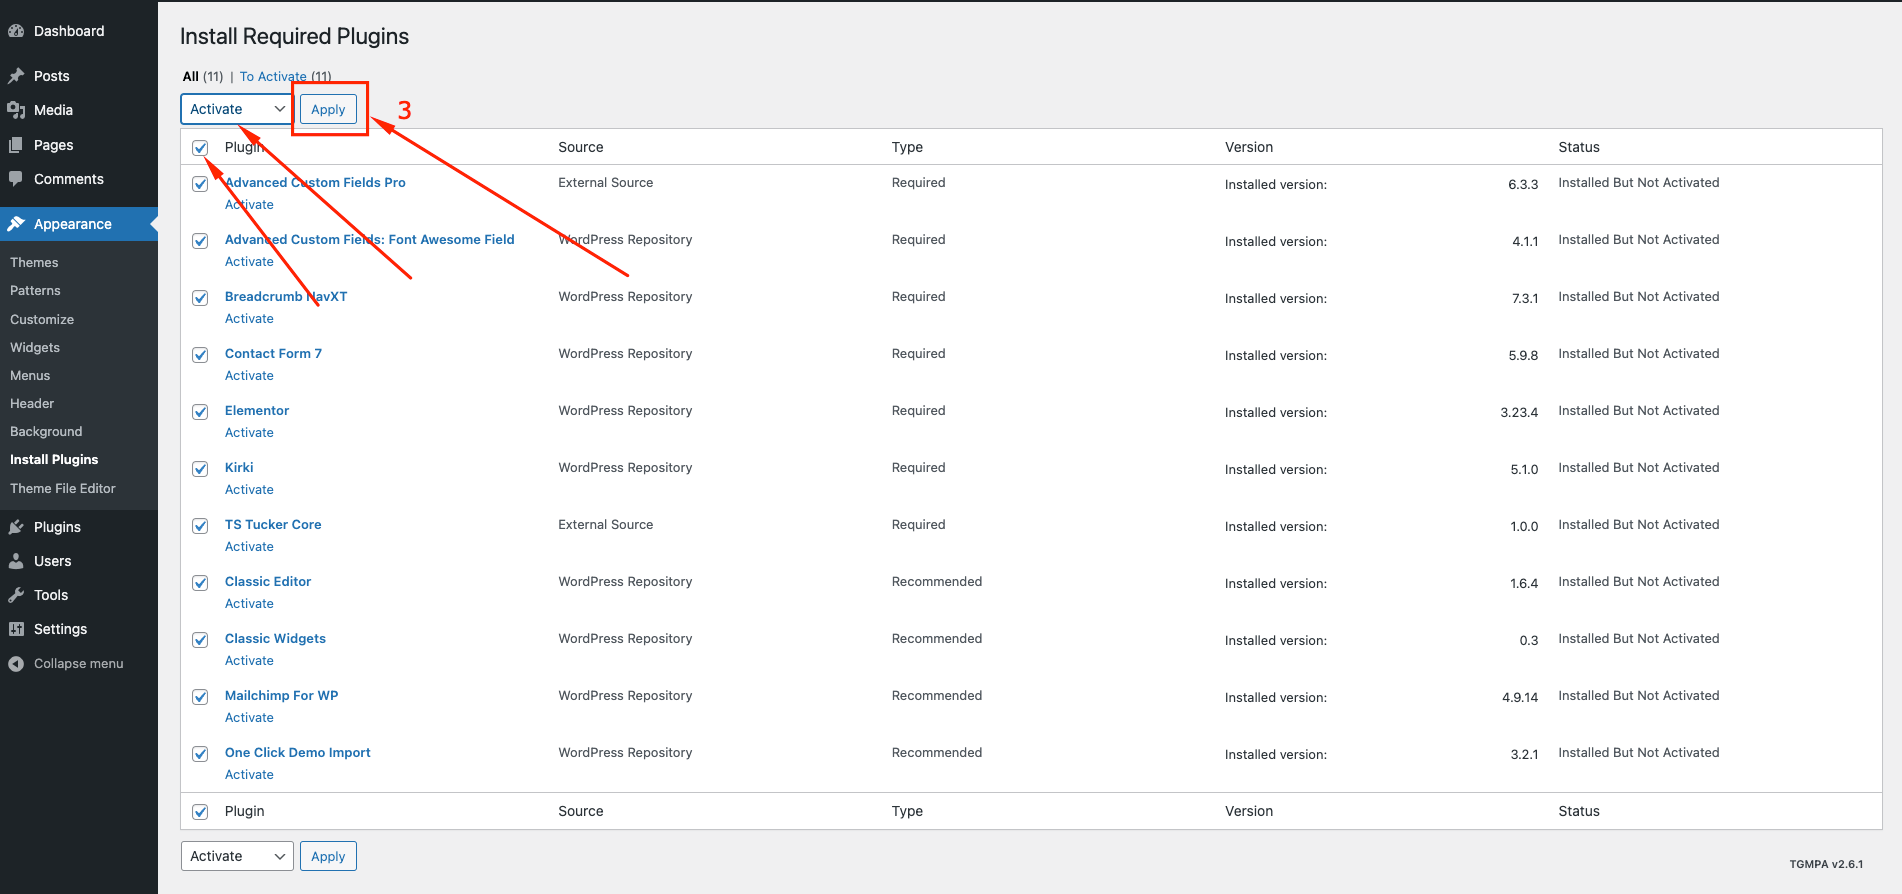
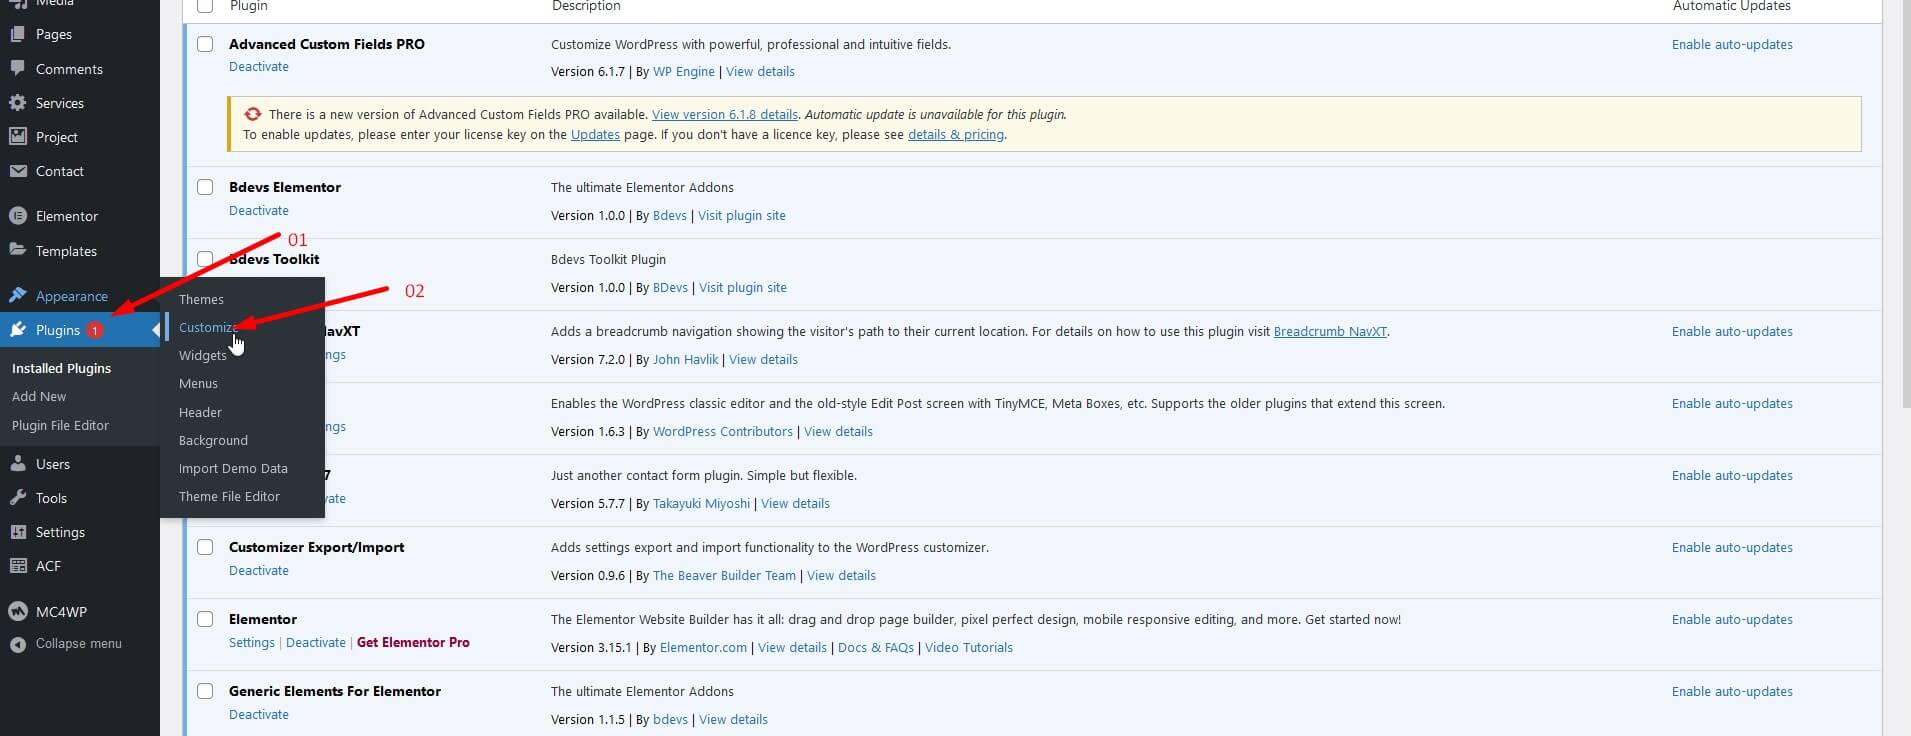
After that you need to install and activate the following pre-packaged plugins:
Server Requirements: https://make.wordpress.org/hosting/handbook/handbook/server-environment
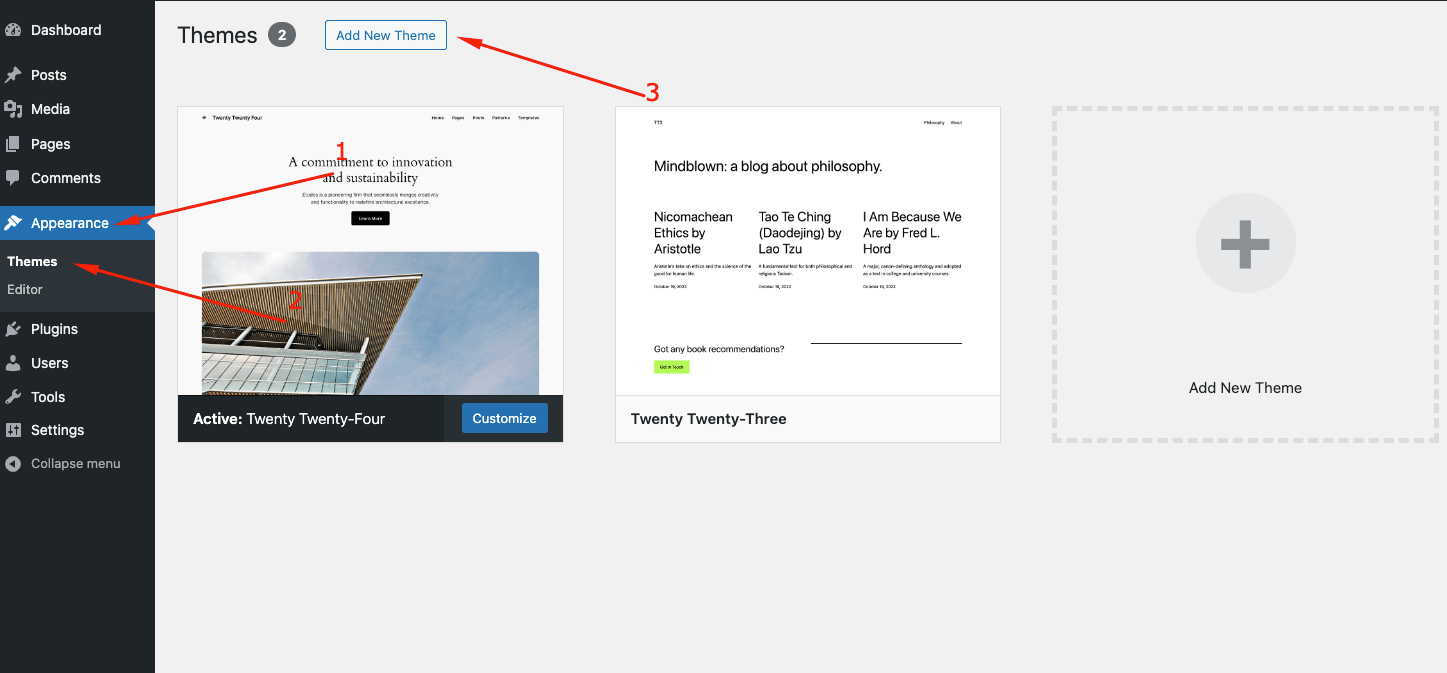
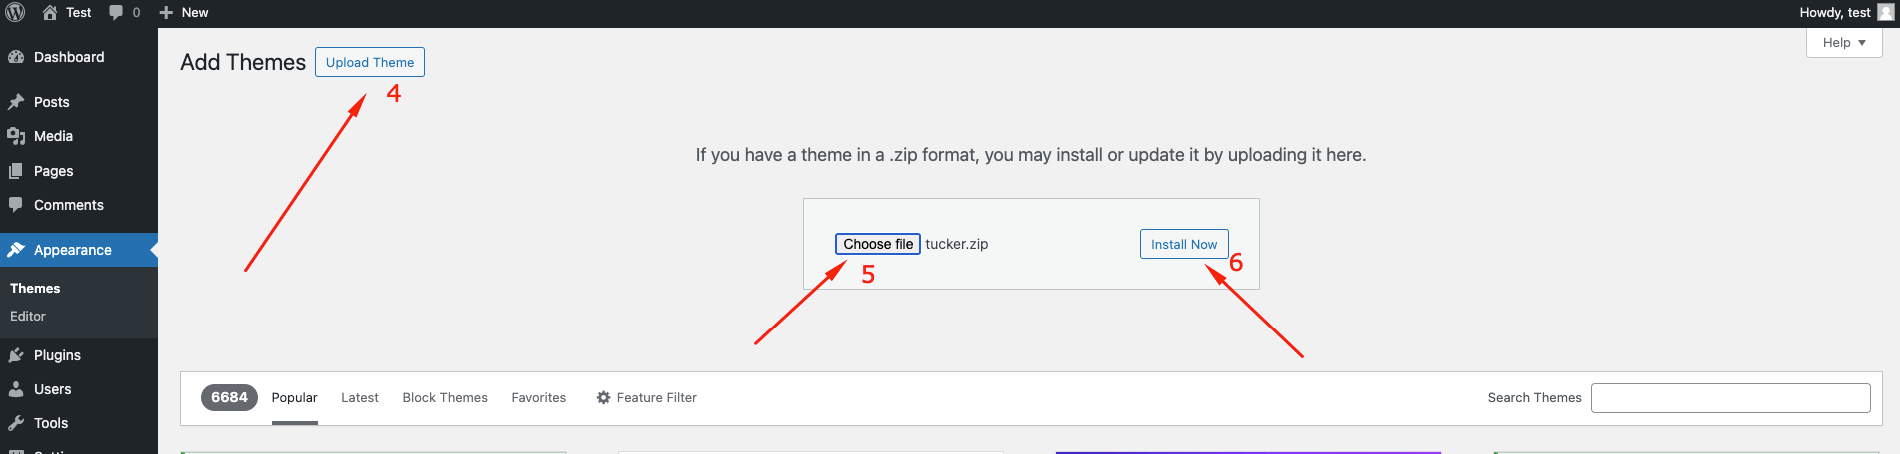
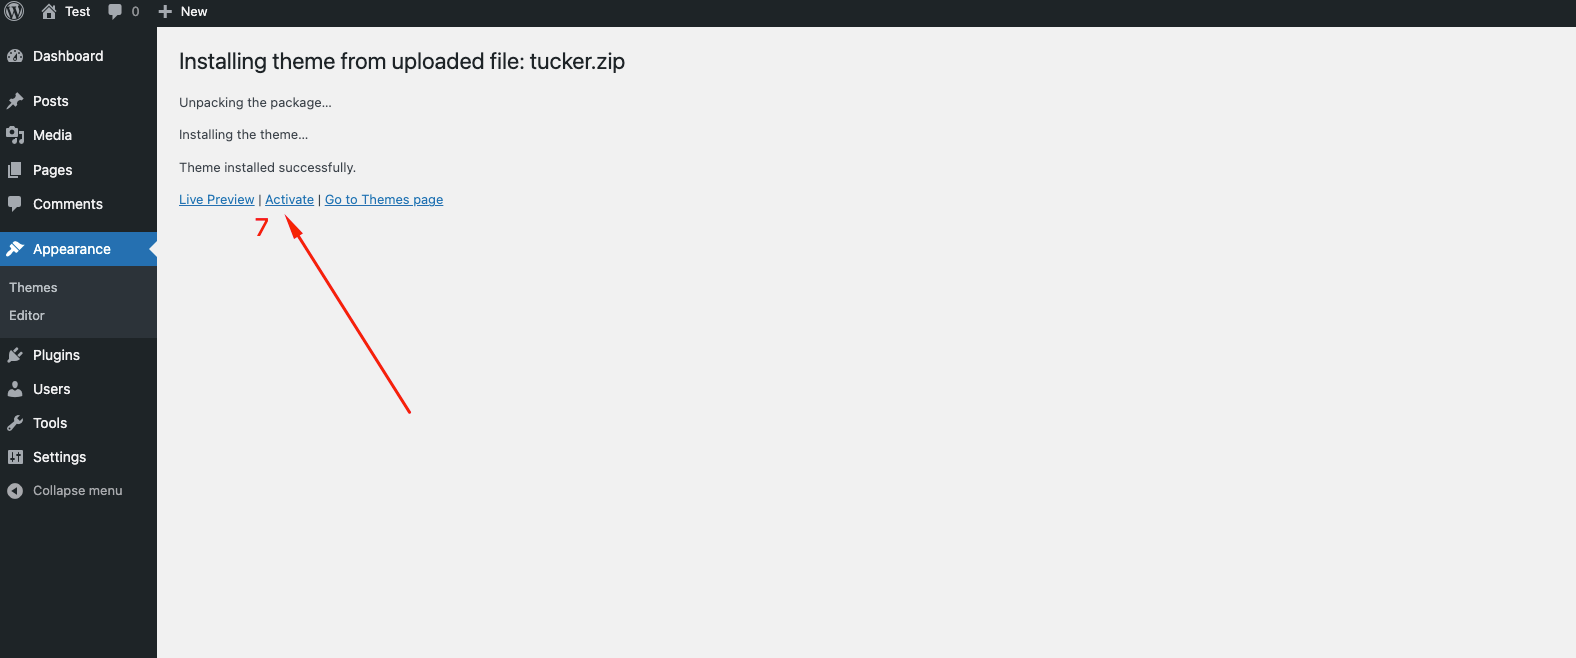
Follow the steps as instructed in the images below:
- From the dashboard go to Appearance Themes Add New Upload Theme
- Click on “Choose File” and select tucker.zip
- Click on “Install Now”
- Active the Theme
Using FTP Clients
Follow the following steps to upload your theme using FTP clients:
- Use an FTP such as FileZilla and go to your WordPress installation director
- Navigate to /wp-content/themes/ folder and upload the theme folder there
- Log in to your WP Admin Dashboard and open the Appearance Themes
- You will now see Tucker Theme listed among the other themes. Click on Activate and you’re done!
Child Theme
Our theme is fully child-theme compatible. We have attached a basic child theme to the download package which contains the minimum of required files. If you are planning any code customizations we highly recommend doing this inside the child theme! Learn more about child themes here.
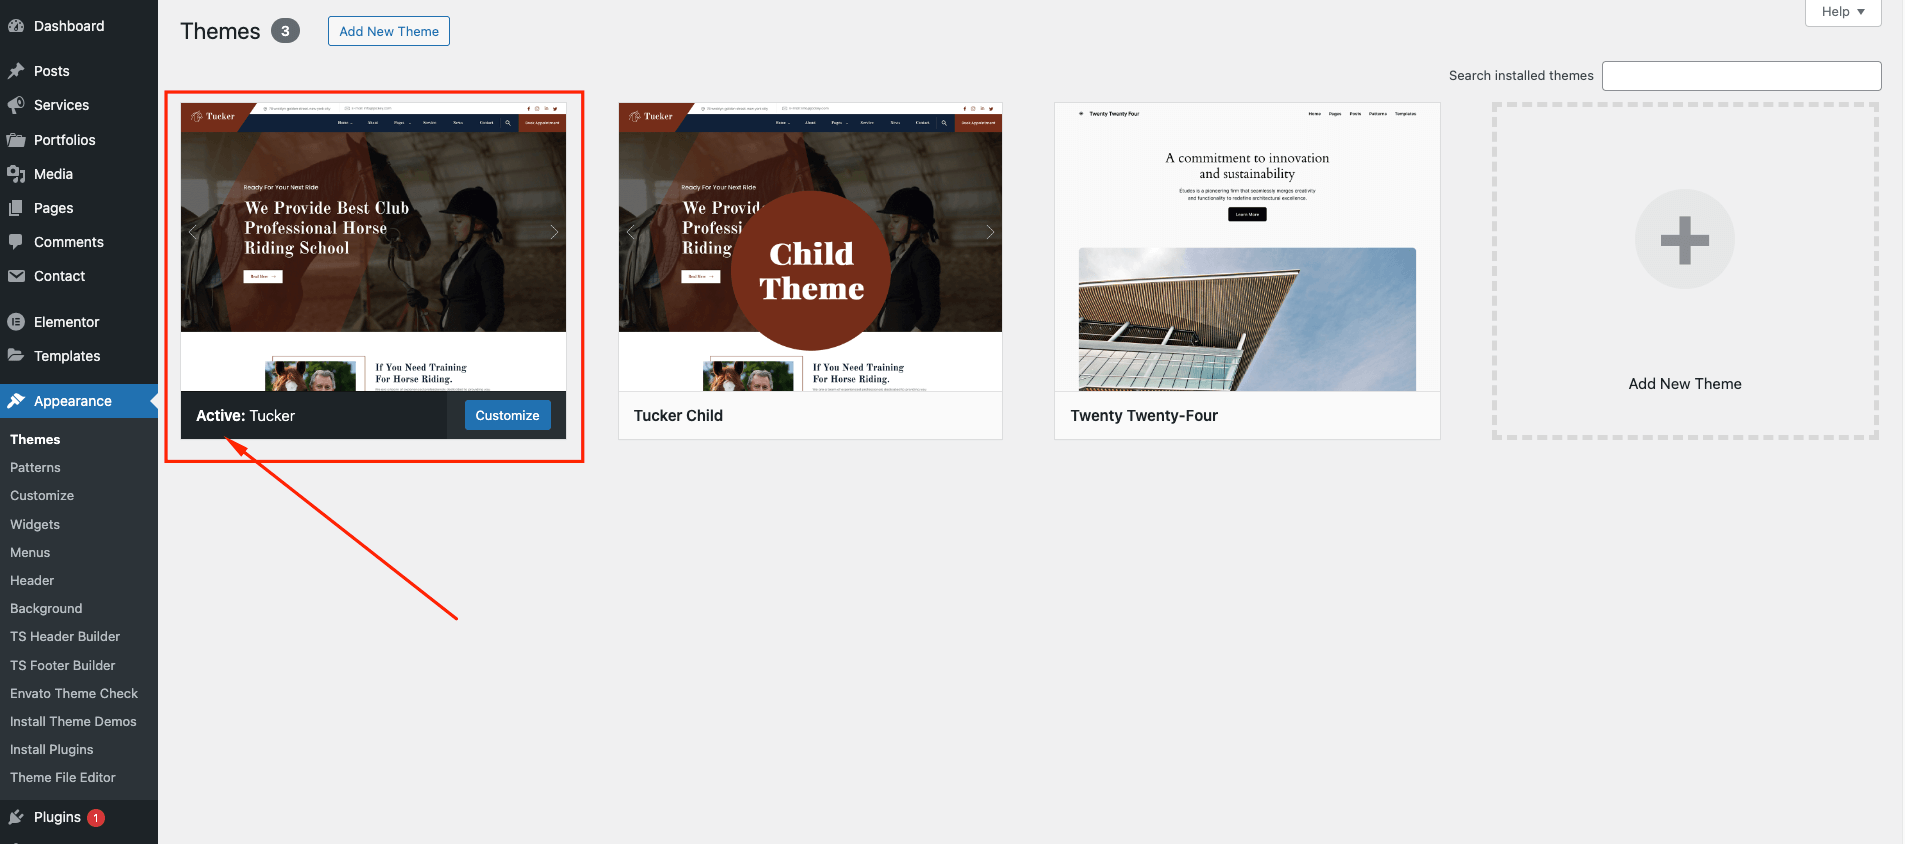
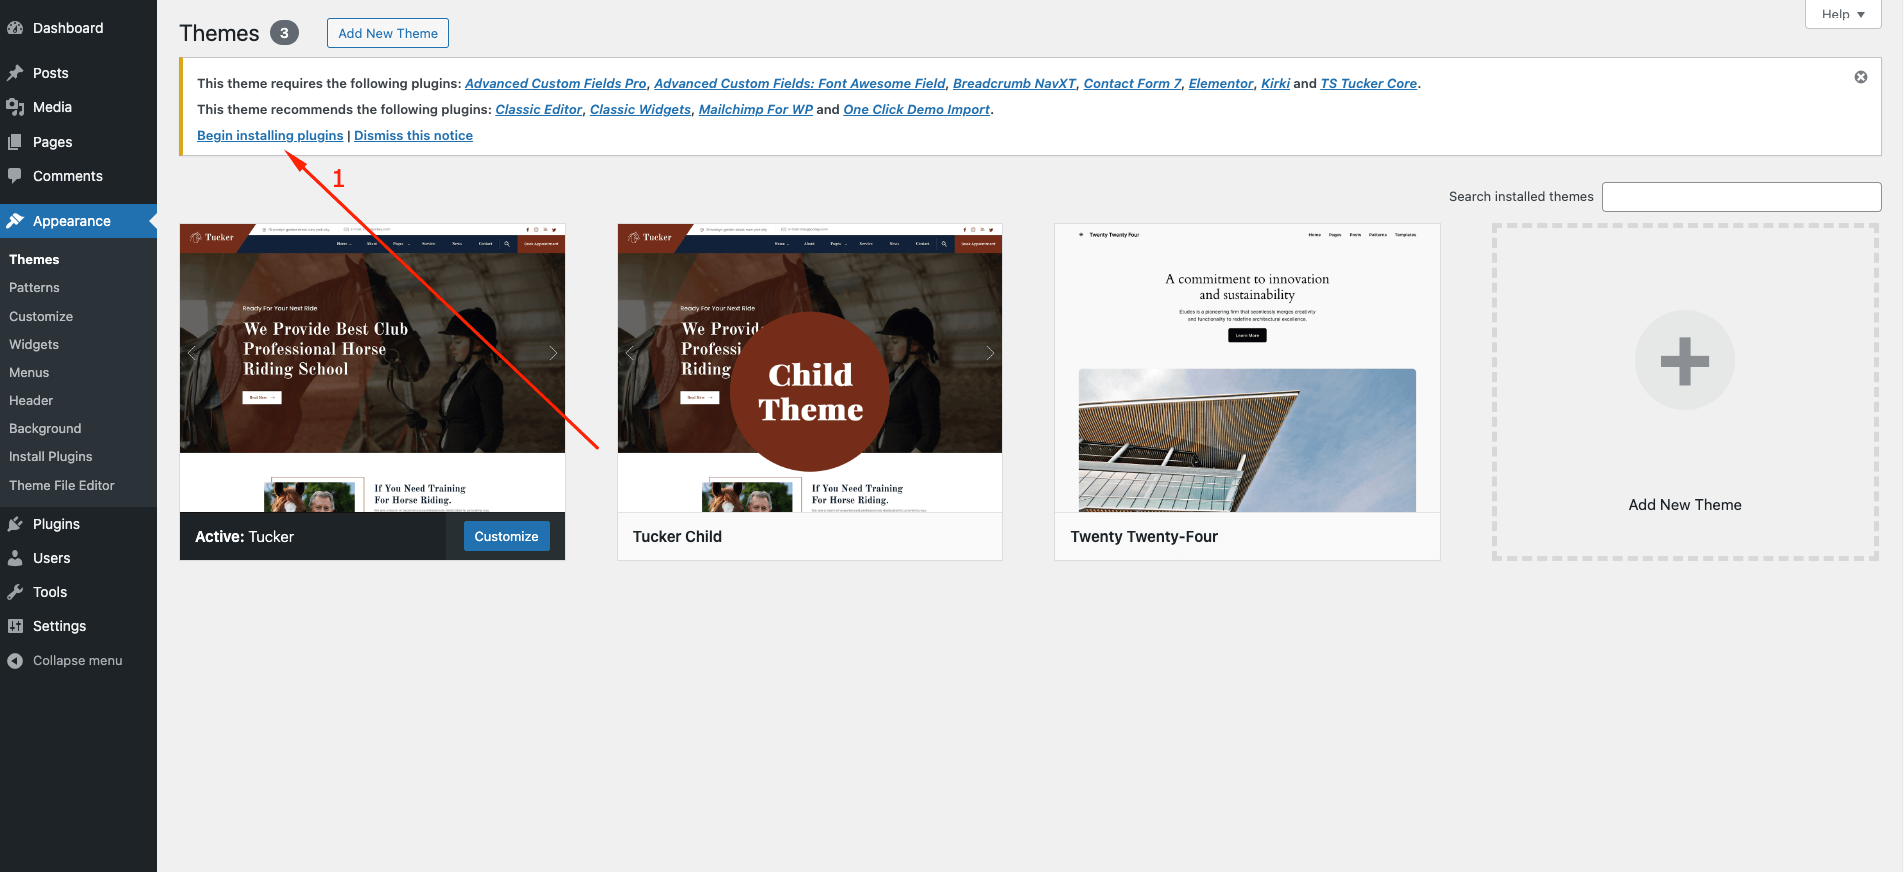
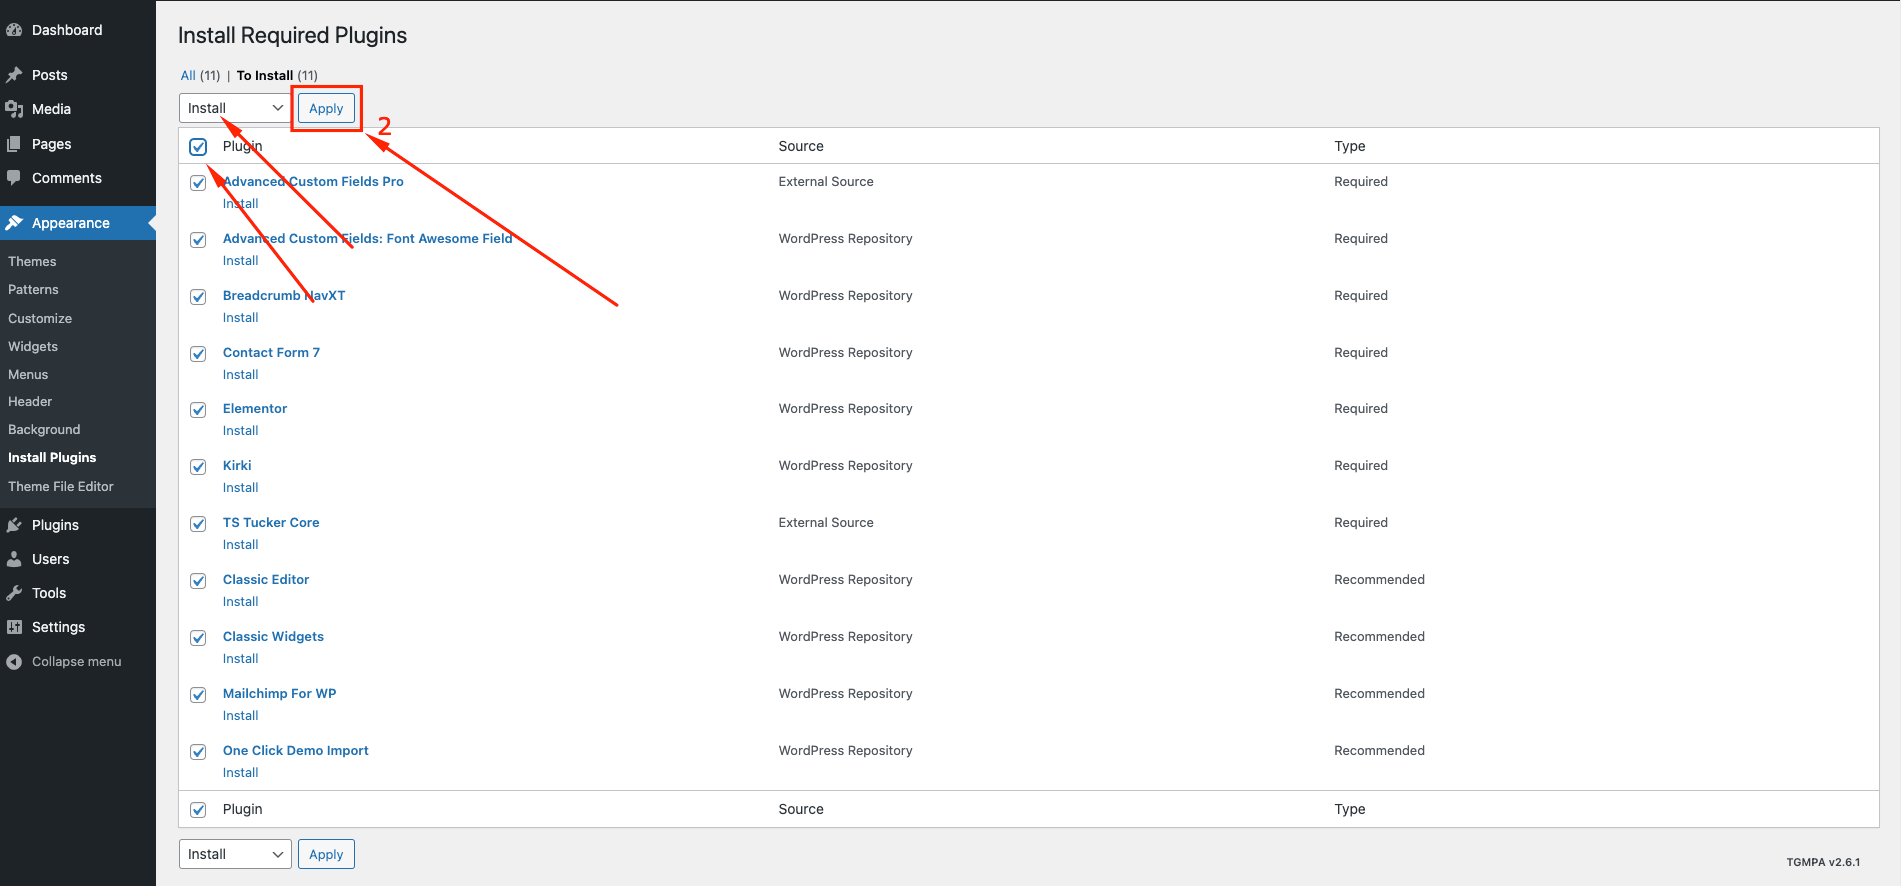
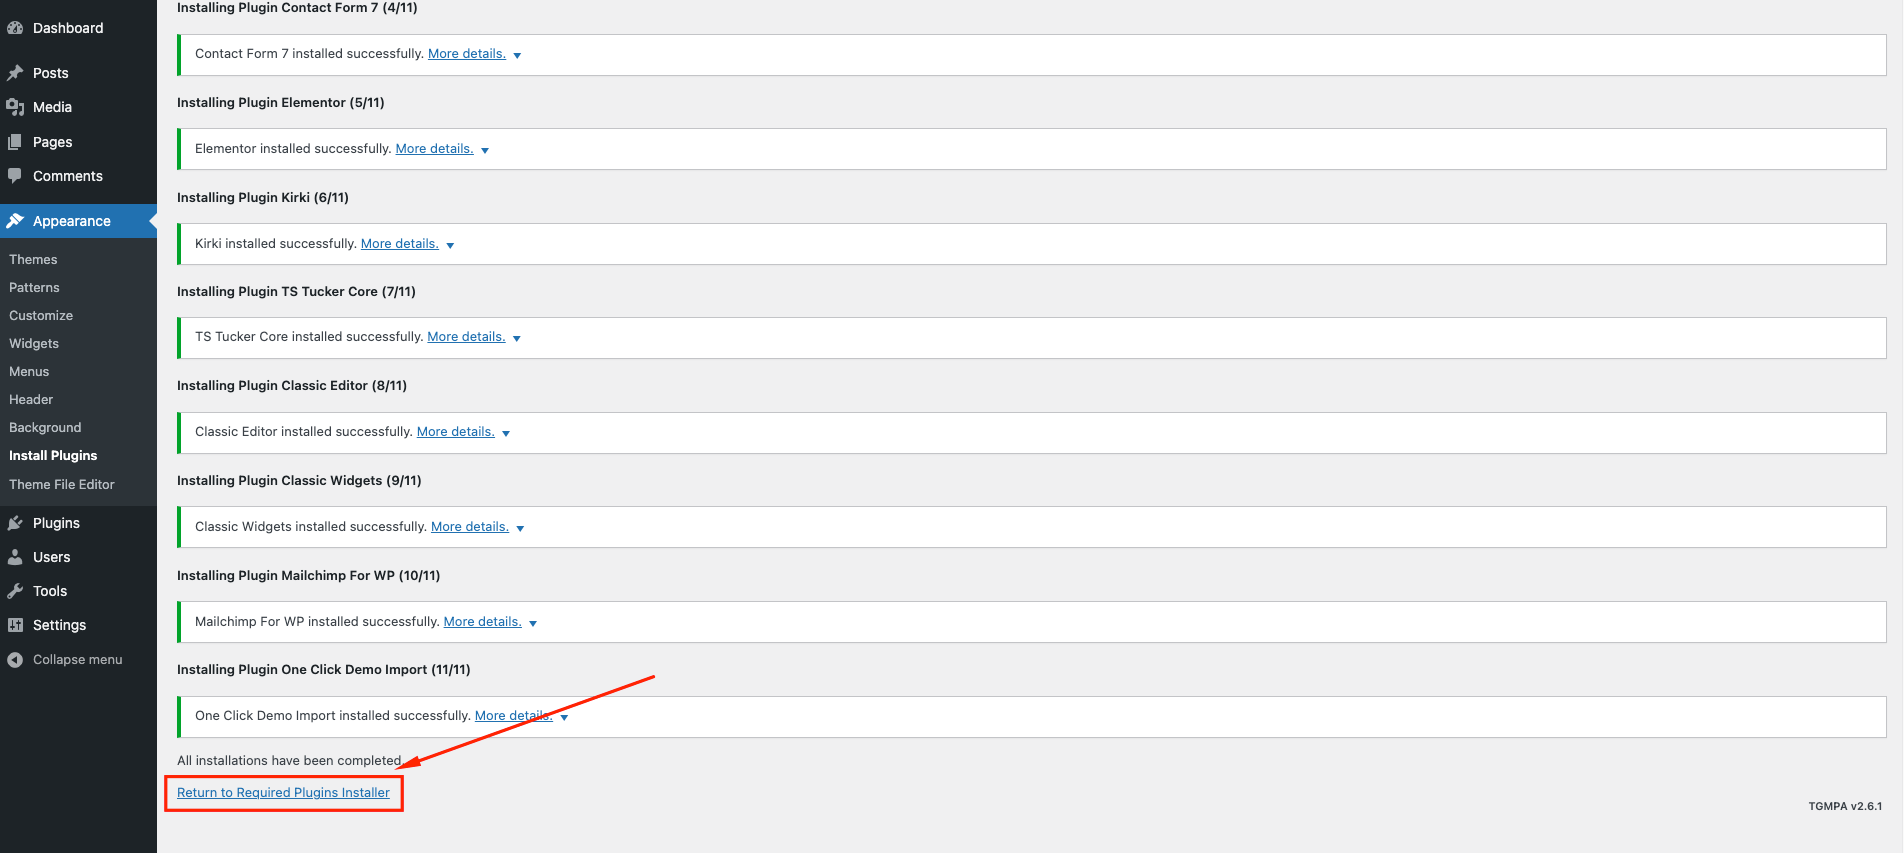
Plugin Installation
After theme installation you need to install and activate included all plugins.
Importing Demo Contents
We are providing you two methods for importing demo contents: Automatic and Alternative. You can follow either one of these methods.
- Automatic (Recommended): This method will remove all your existing data, so use this method only in fresh website. This procedure will be faster because you just have to do one click and then everything will happen automatically. If you want an exact clone of demo website without doing any manual configuration after importing data then this method is appropriate for you.
- Alternative: Use this method only if: Automatic demo import method fails and You already have a working website with existing contents(eg. posts, pages etc).
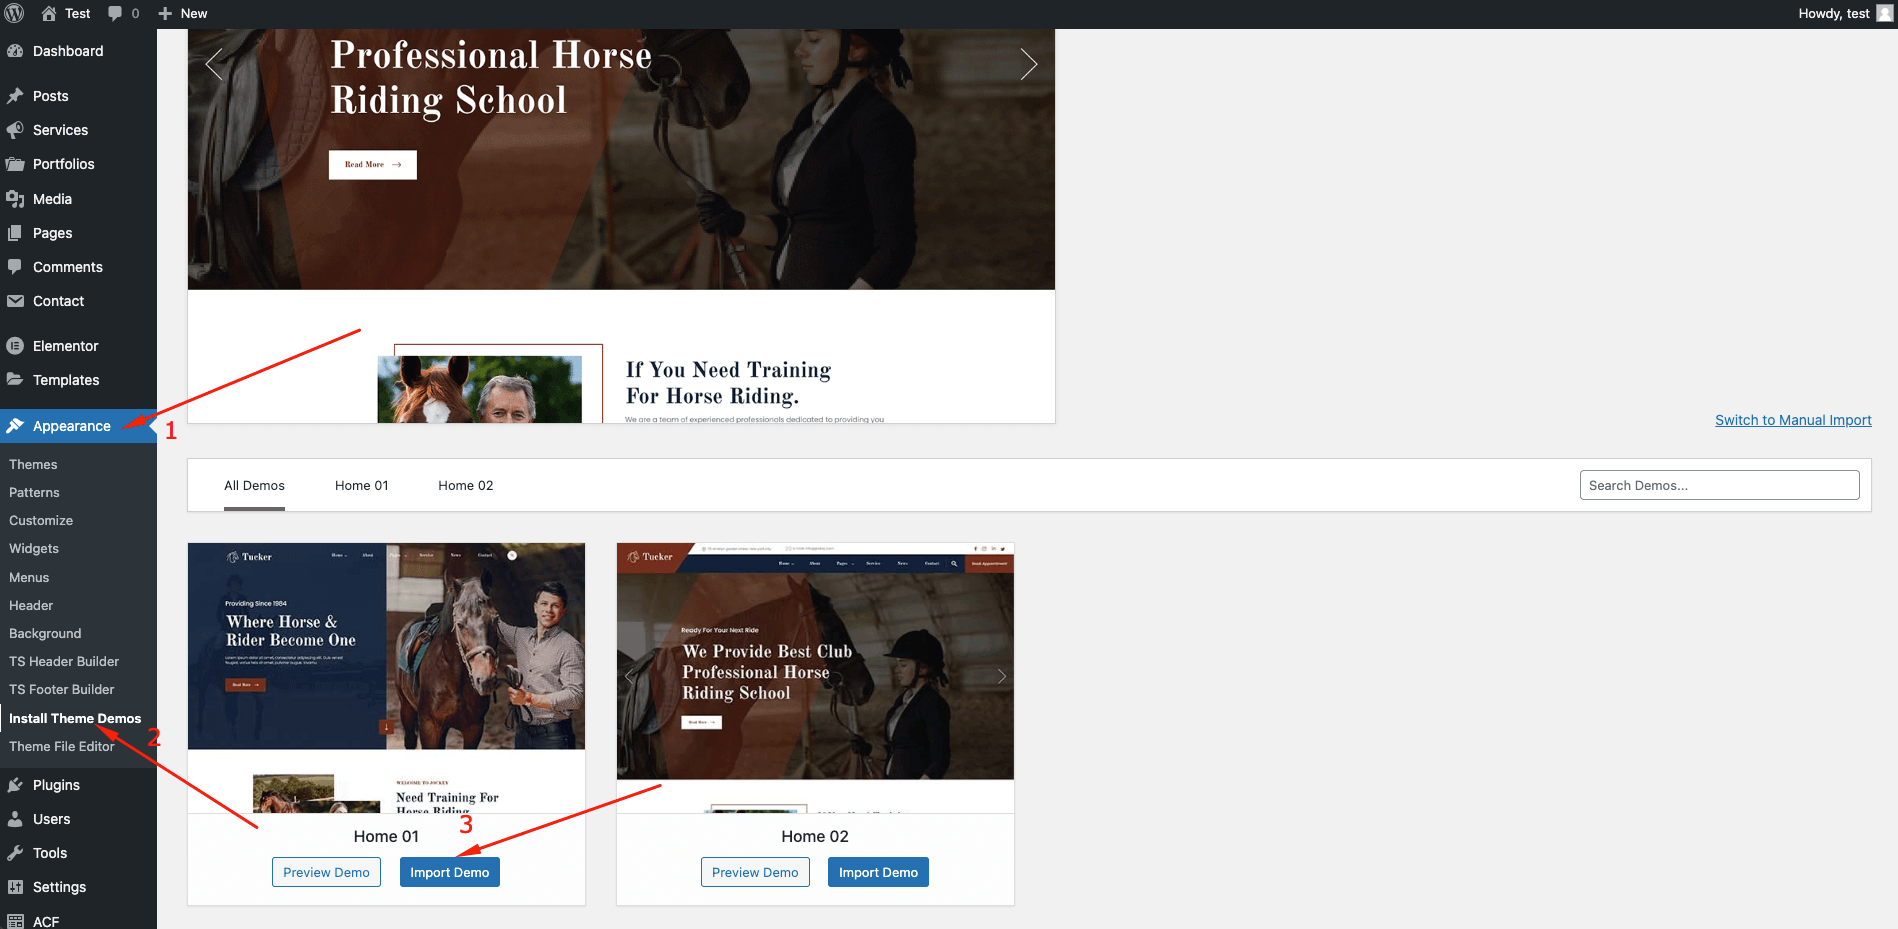
Automatic Import
Important! Before proceeding, please remember that when you are done with the demo import, all existing settings and contents will be removed and replaced by the demo contents. So it is highly recommended that you should only do this in fresh site.
- First please make sure that Tucker Parent Theme is activated on your site
- From the dashboard go to Appearance Install Theme Demos Import Demo
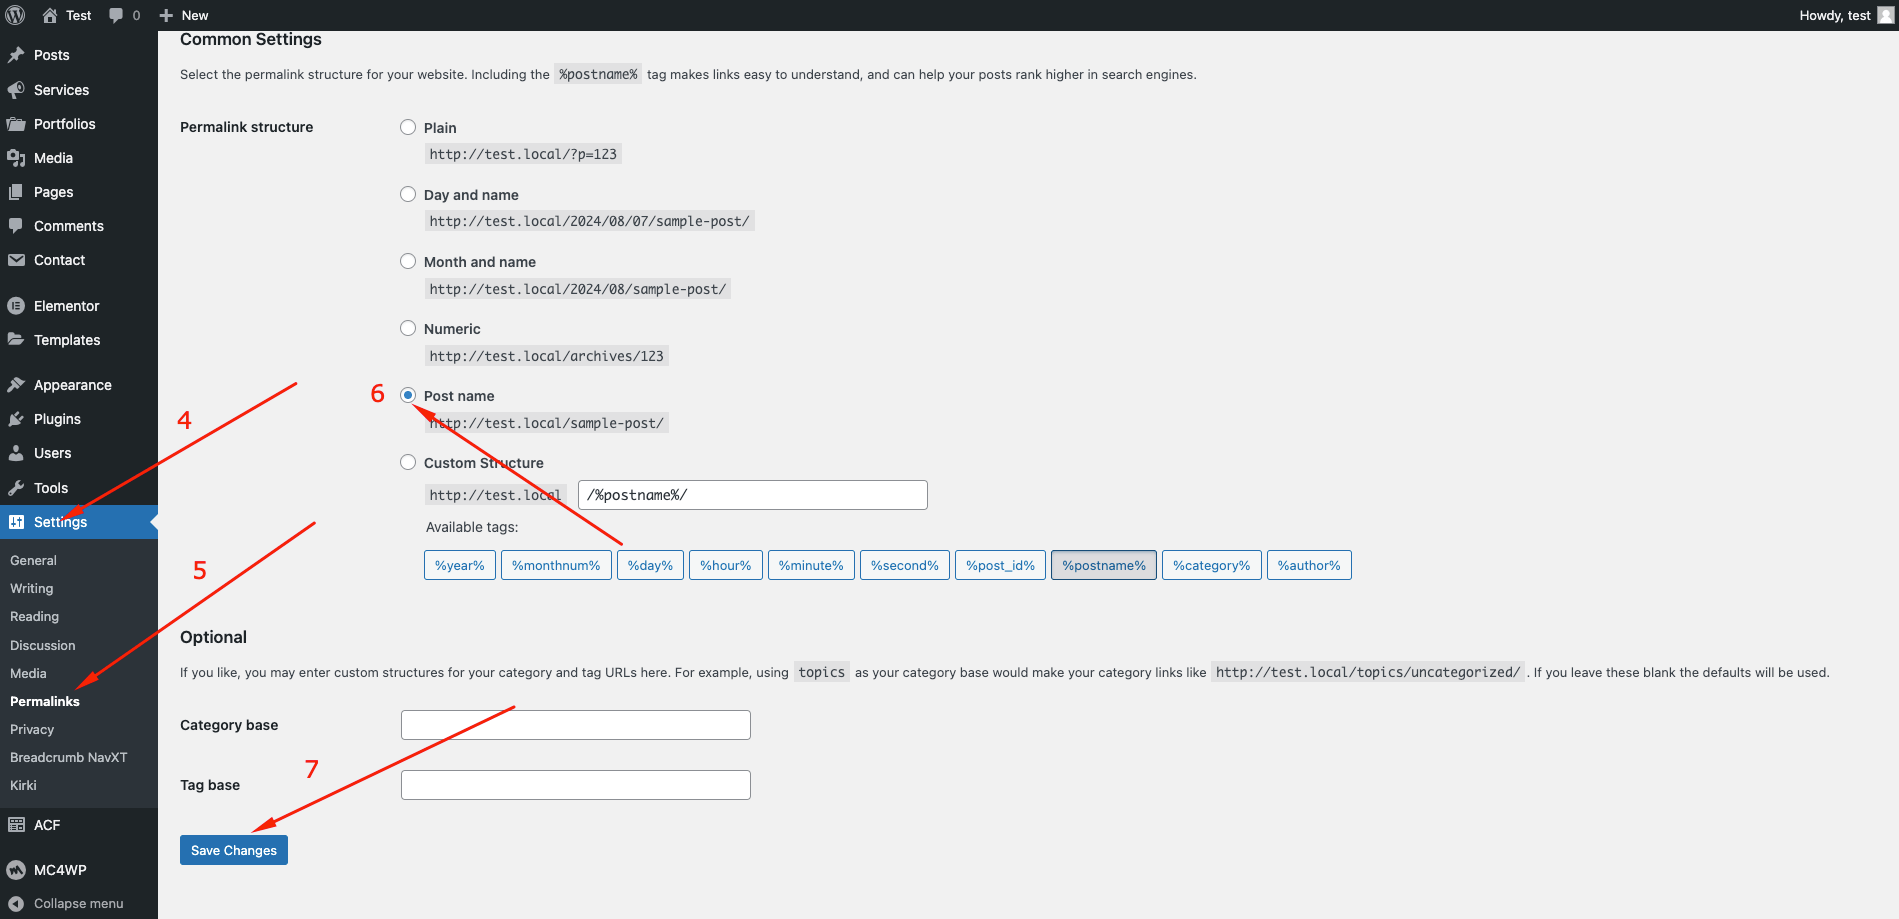
- To update permalink, navigate to Settings Permalink Post name Save Changes
Manual Import
We have provided some sample contents inside sample-data directory which comes with your theme package. You have to import those contents.
- First please make sure that Tucker Parent Theme is activated on your site
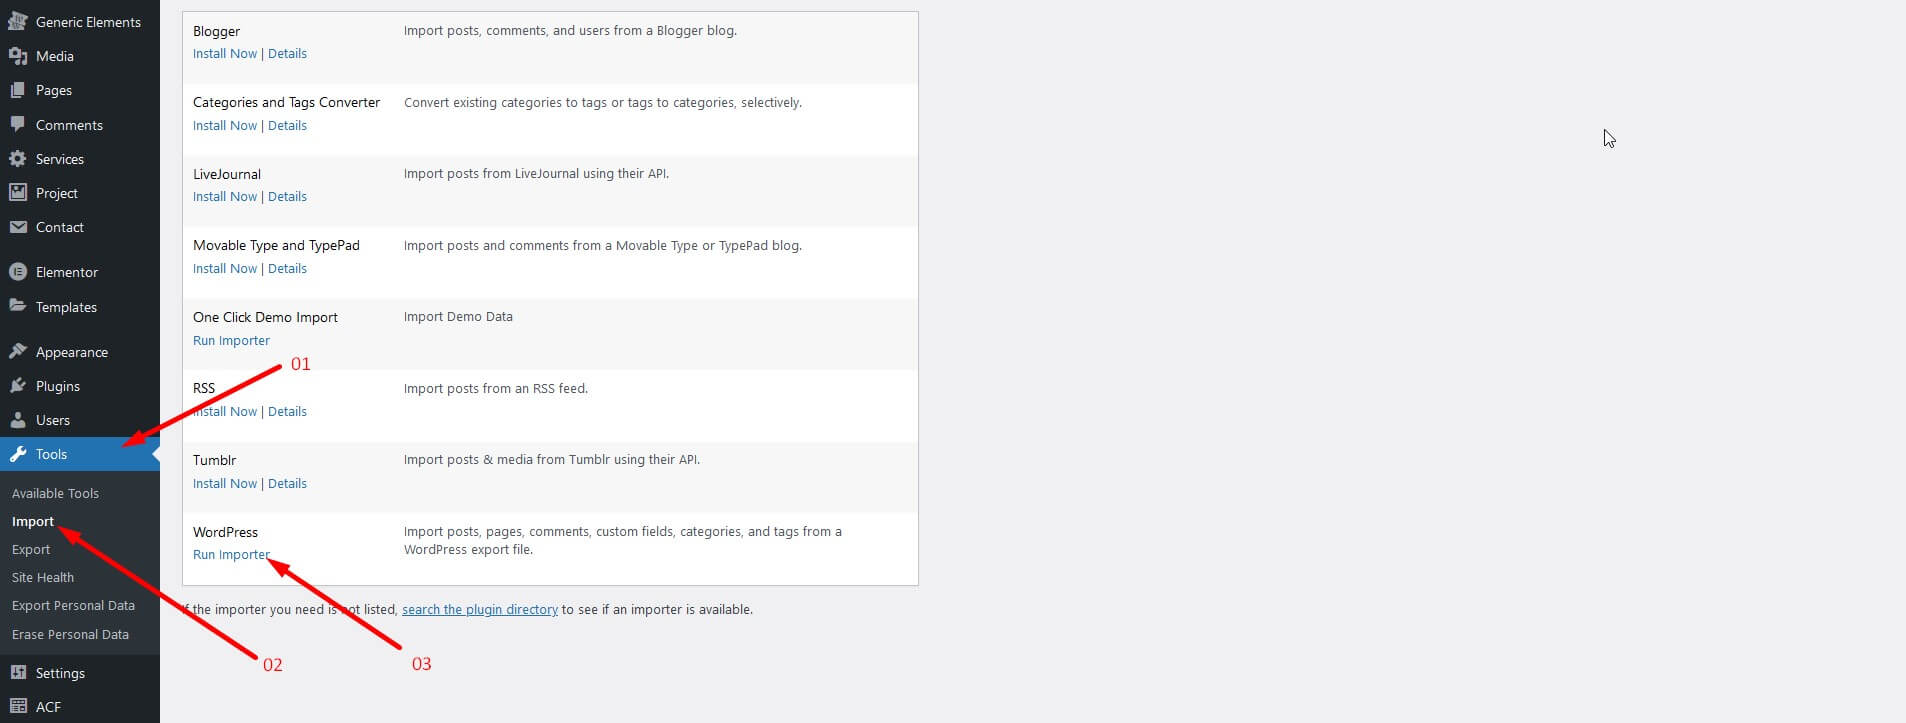
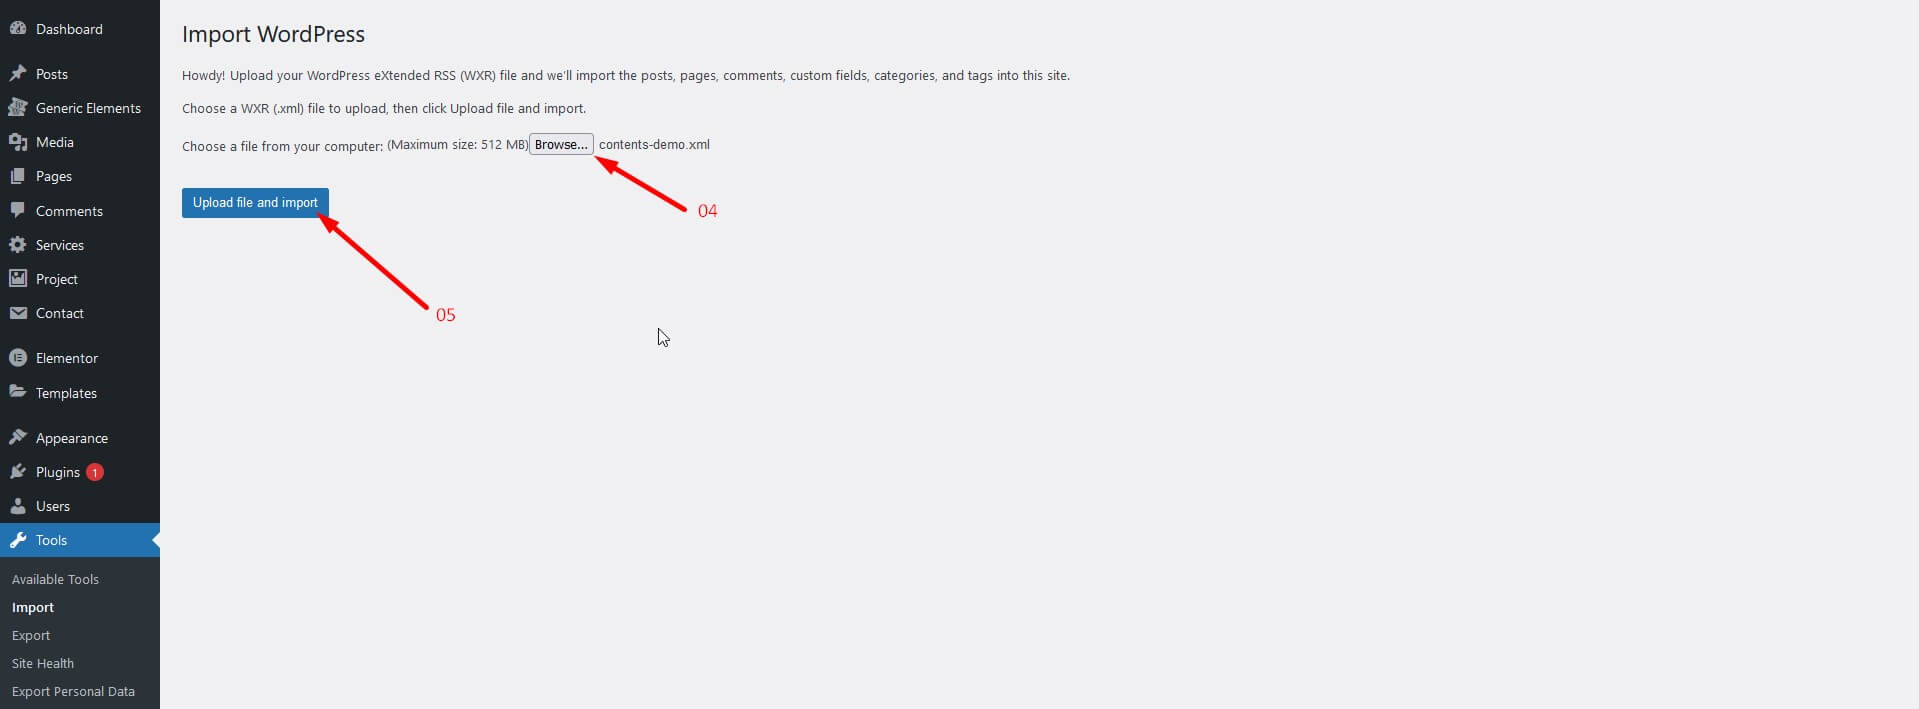
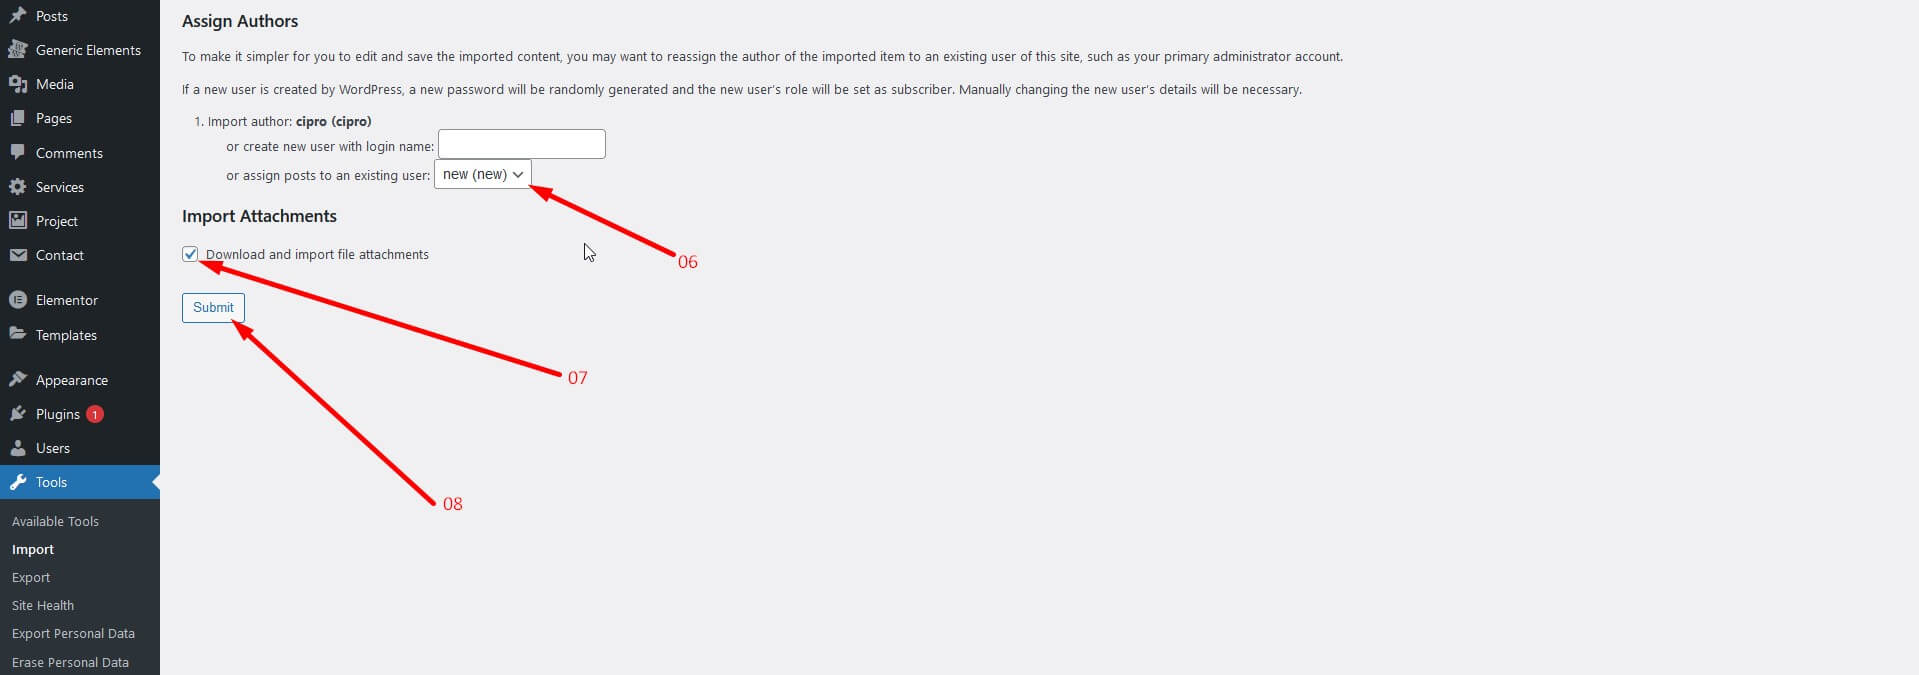
- Importing Contents : From the dashboard go to Tools Import Install Now (WordPress) Run Importer Choose file -> contents-demo.xml Upload file and import
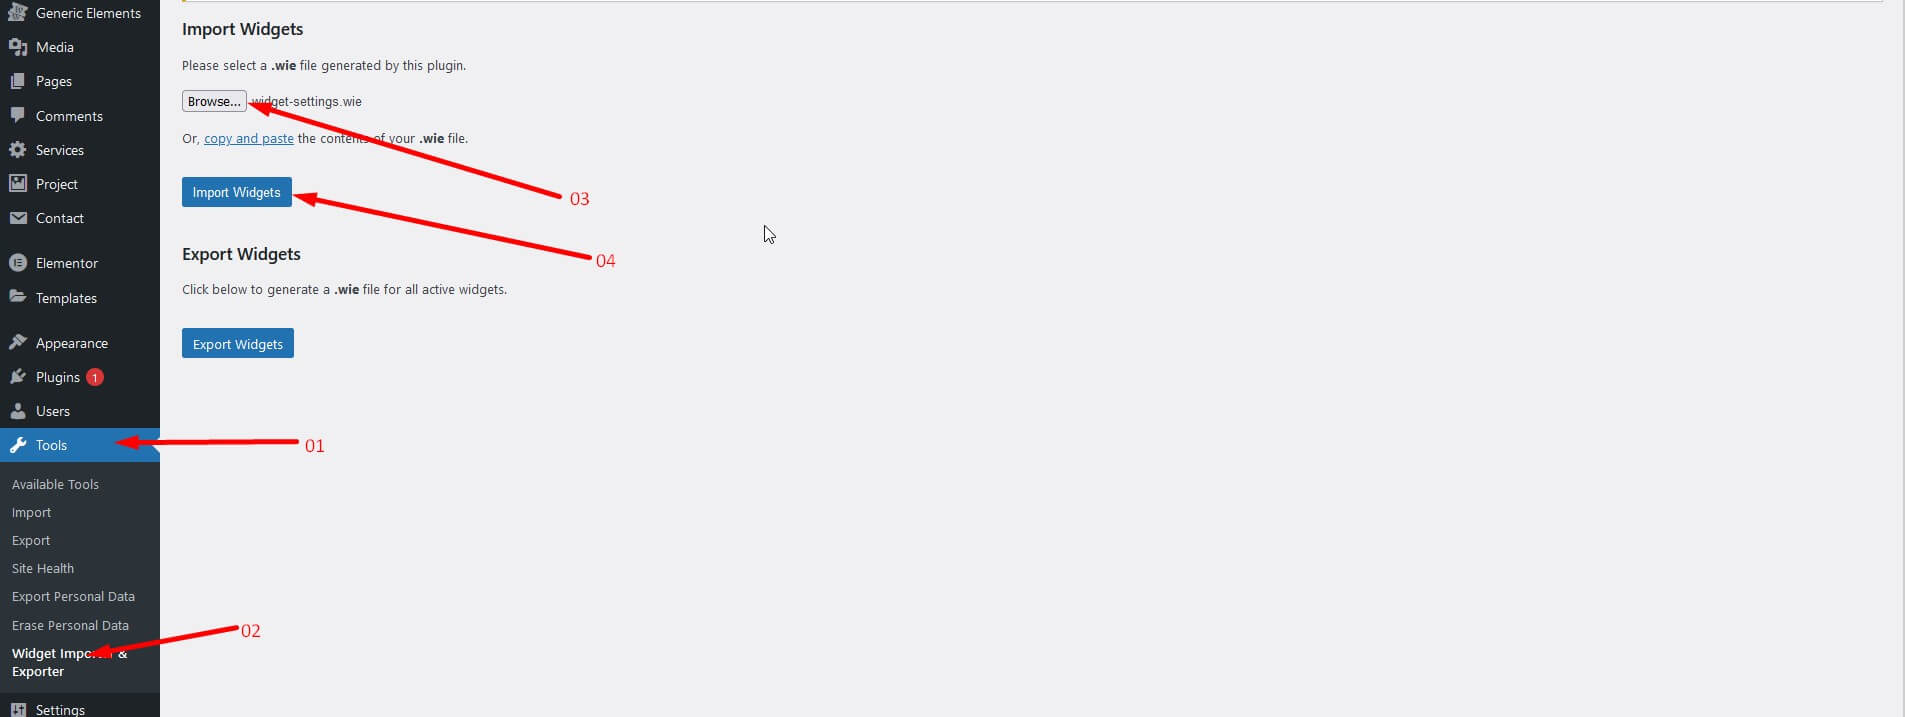
- Importing Widgets :
You need to install Widget Importer & Exporter plugin for importing Widgets.
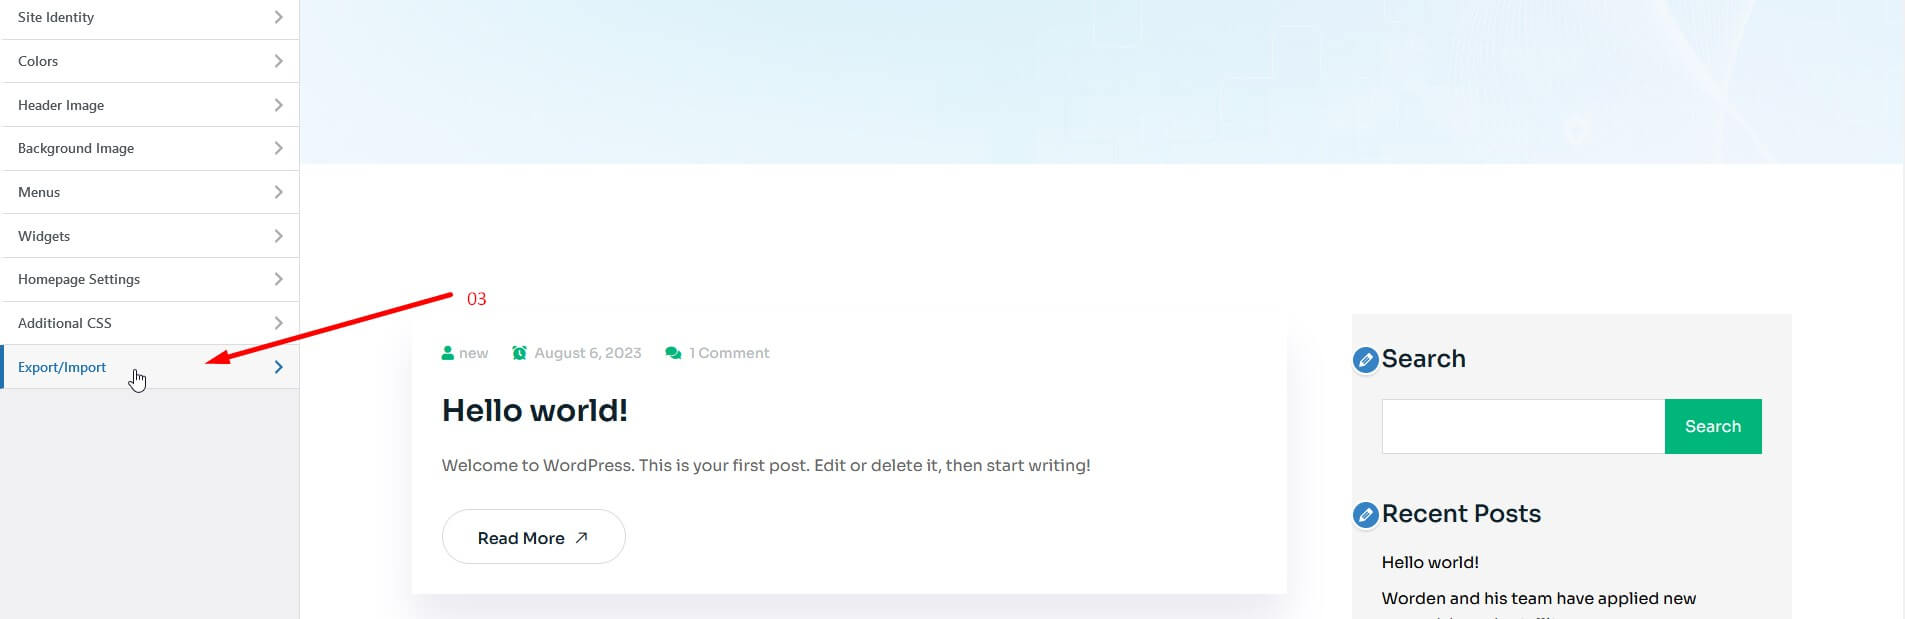
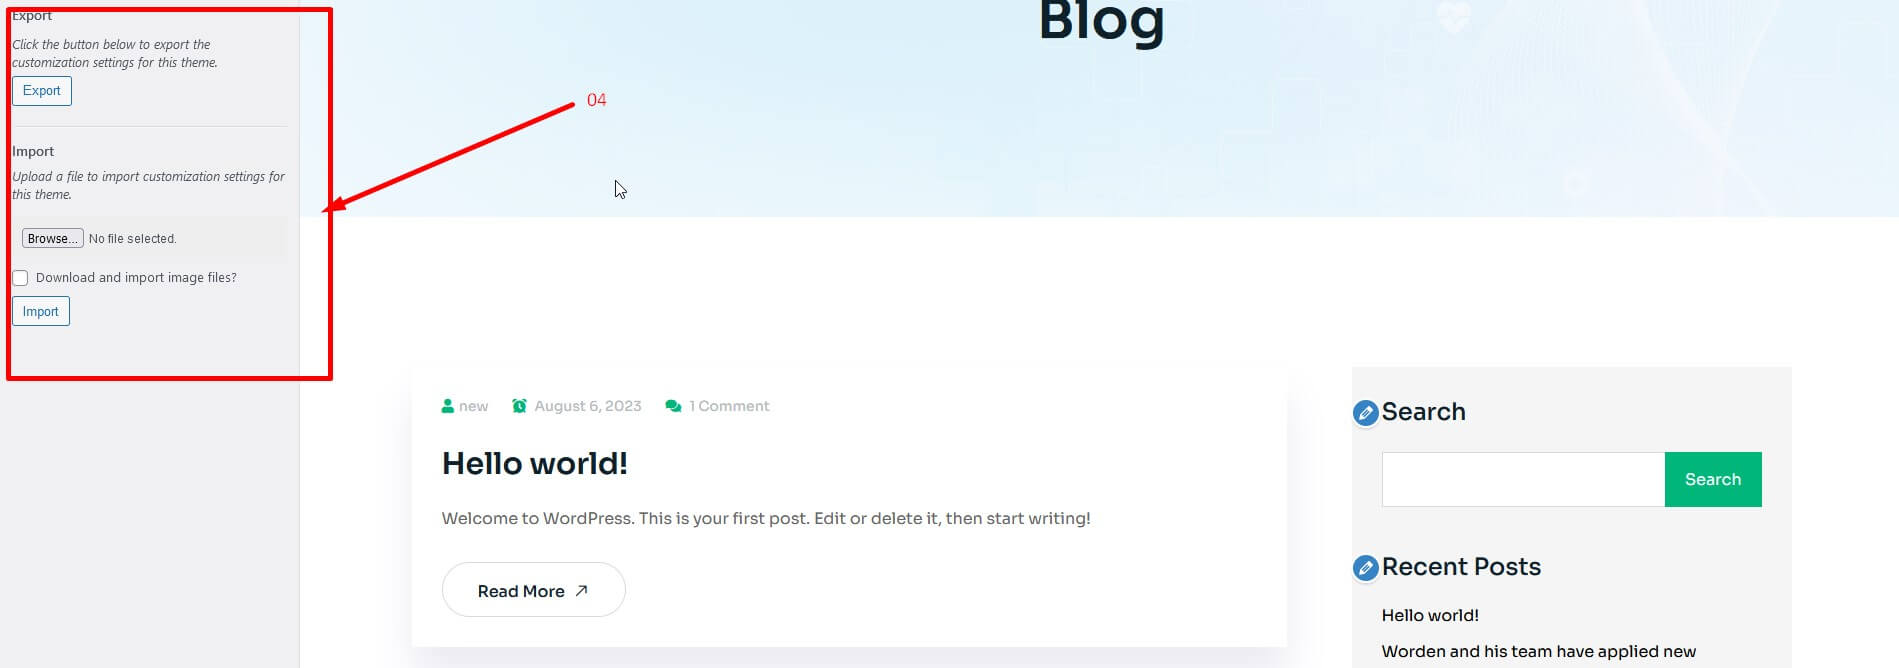
Tools Widget Importer & Exporter Choose file -> widget-settings.json Import Widgets - Importing Customizer options :
You need to install Customizer Export Import plugin for importing Customizer options
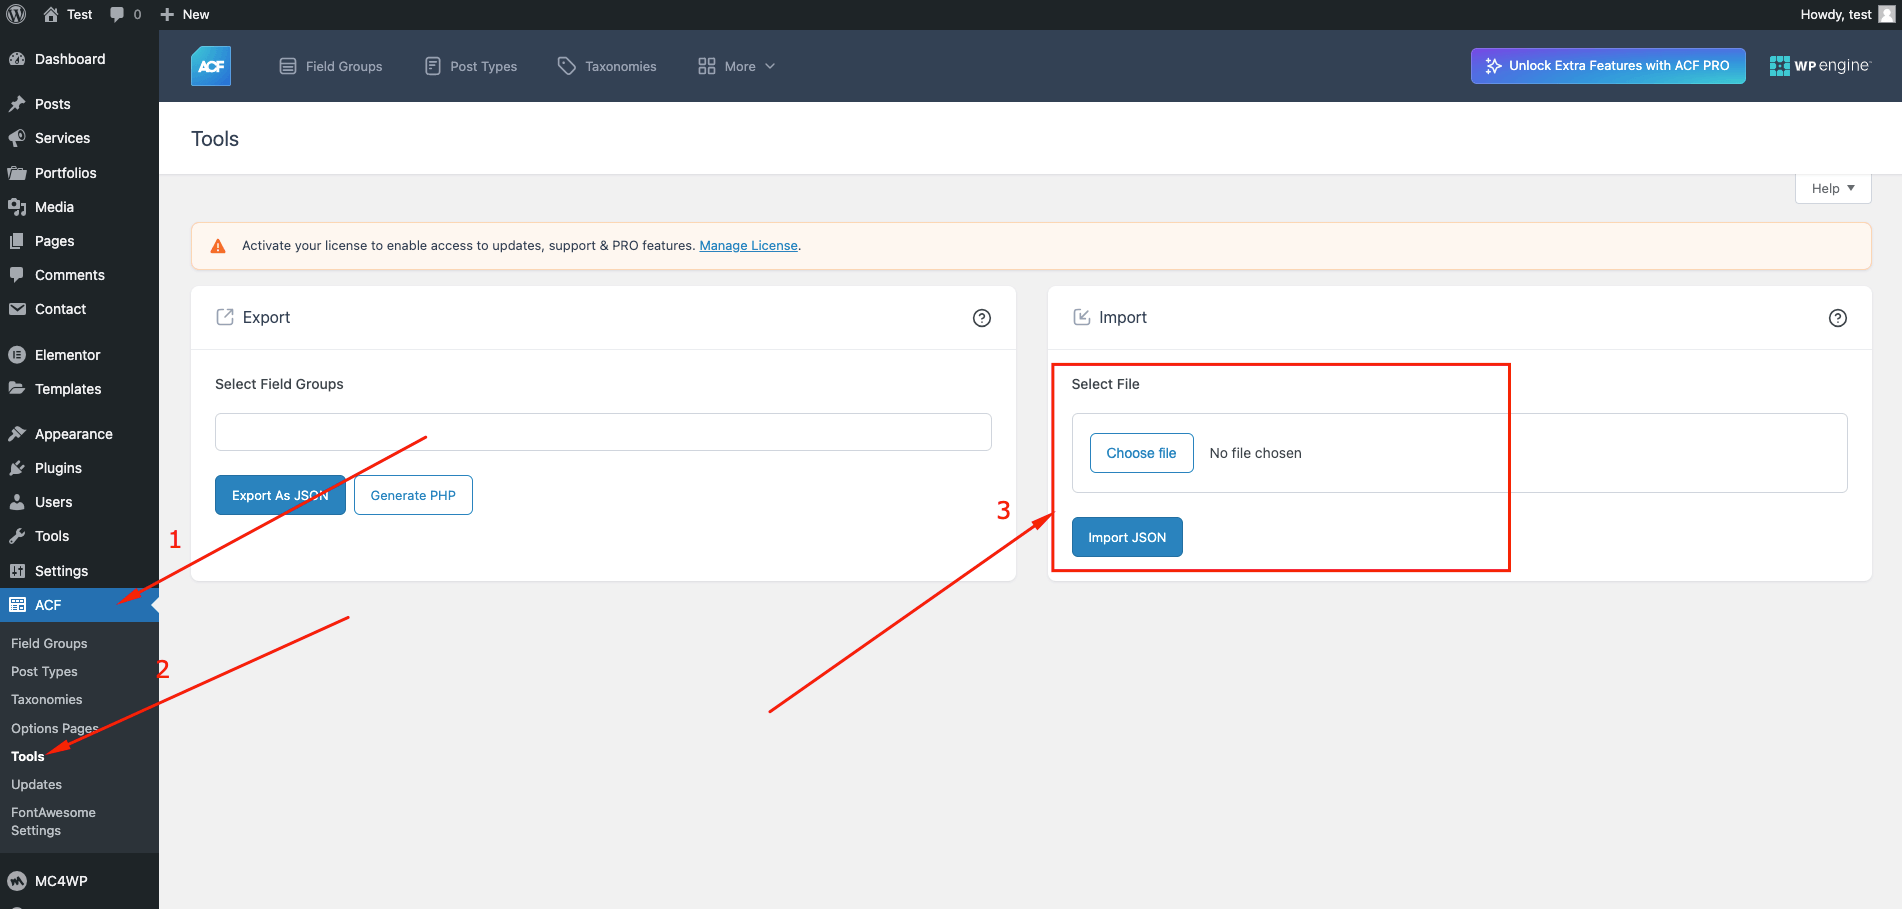
Appearance Customize Export/Import Import Choose file -> customizer-data.dat -> checked Import - Importing ACF fields : From the dashboard go to ACF Tools Import Choose file -> acf-data.json Import JSON
Importing Contents
Importing Widgets
Importing Customizer options
Importing ACF Fields
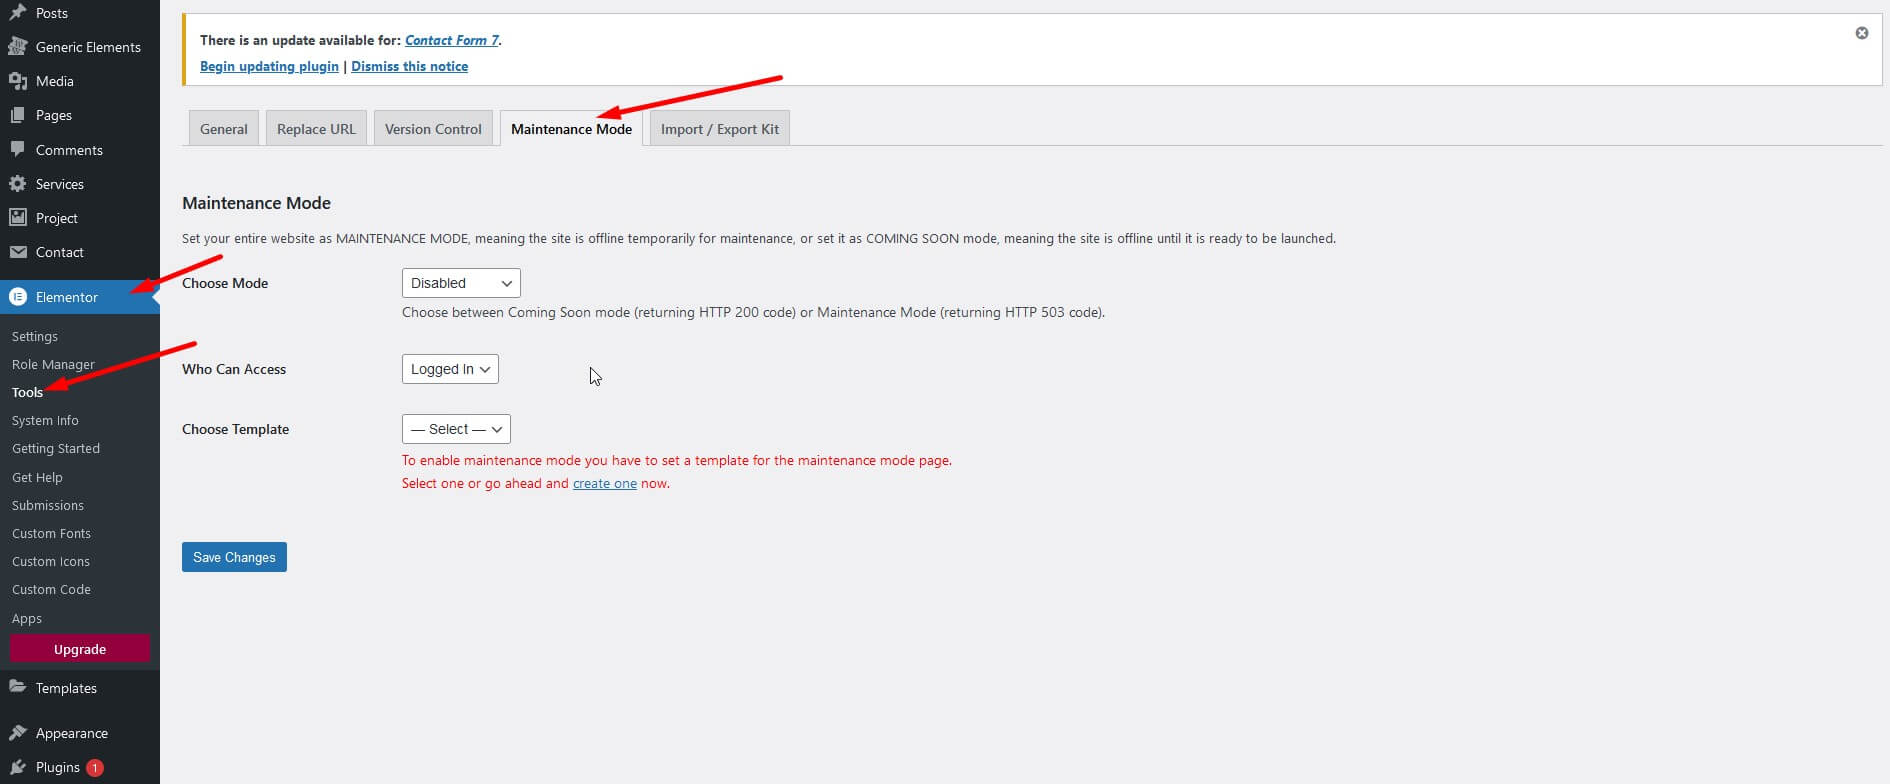
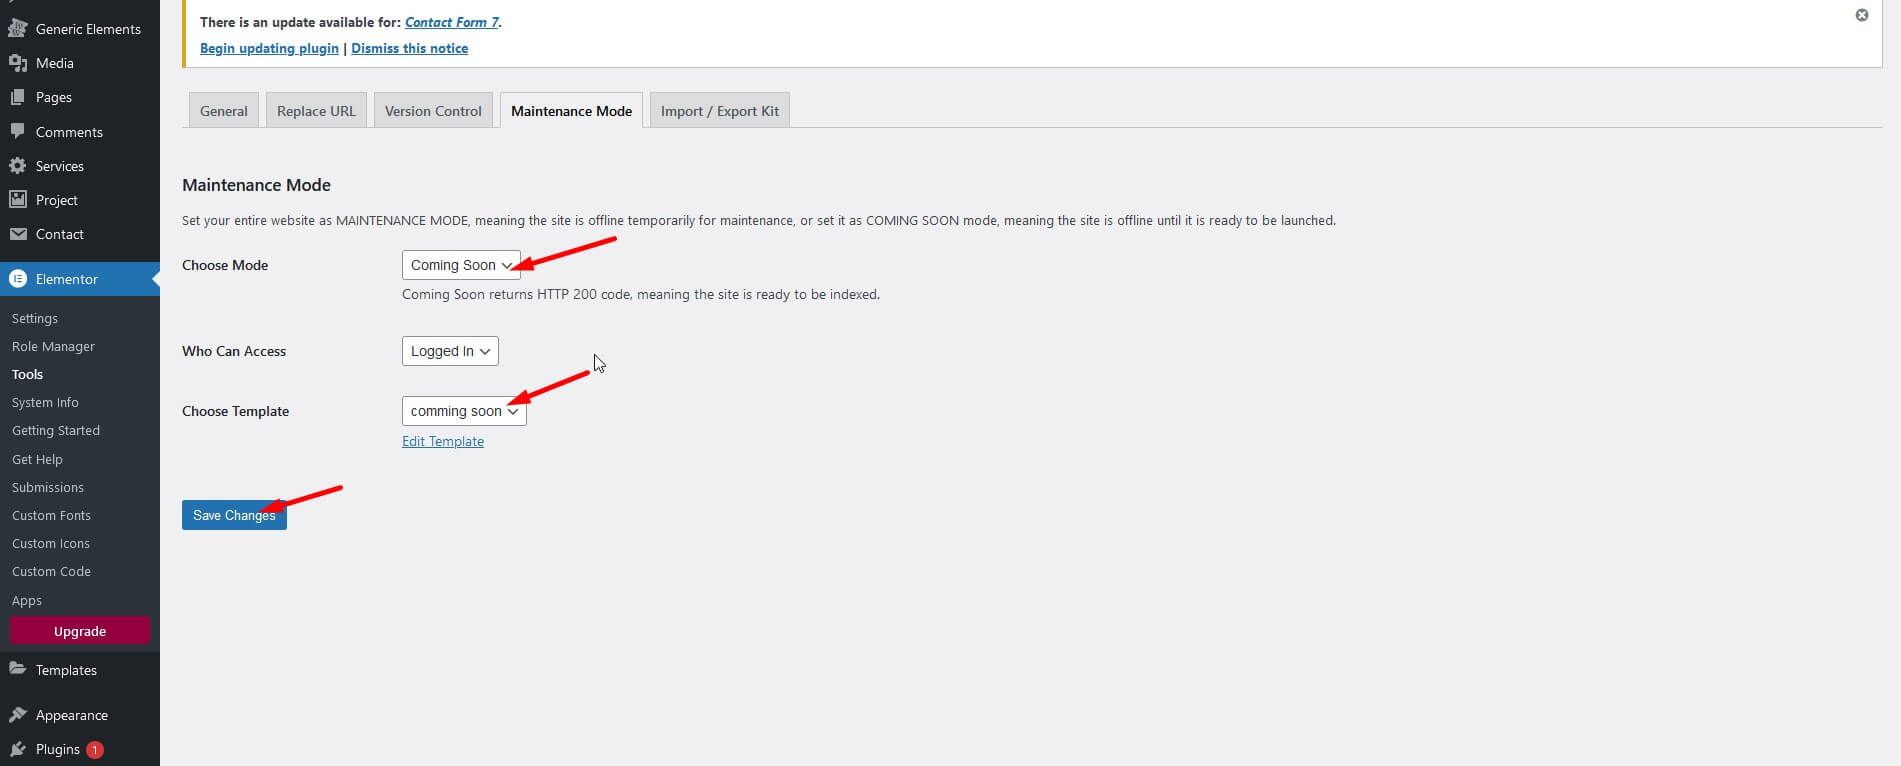
Turn on Coming Soon/Maintenance Mode
WordPress Maintenance Mode: How to Use It. https://elementor.com/blog/wordpress-maintenance-mode/
- Navigate to Dashboard Elementor Tools Maintenance Mode
- Choose between Coming Soon and Maintenance Mode
- Set the template for the Coming Soon Mode. Template name "Coming Soon"
Note: You will see a red button on your top WordPress bar with the text: "Maintenance Mode ON".
Basic Site Setting
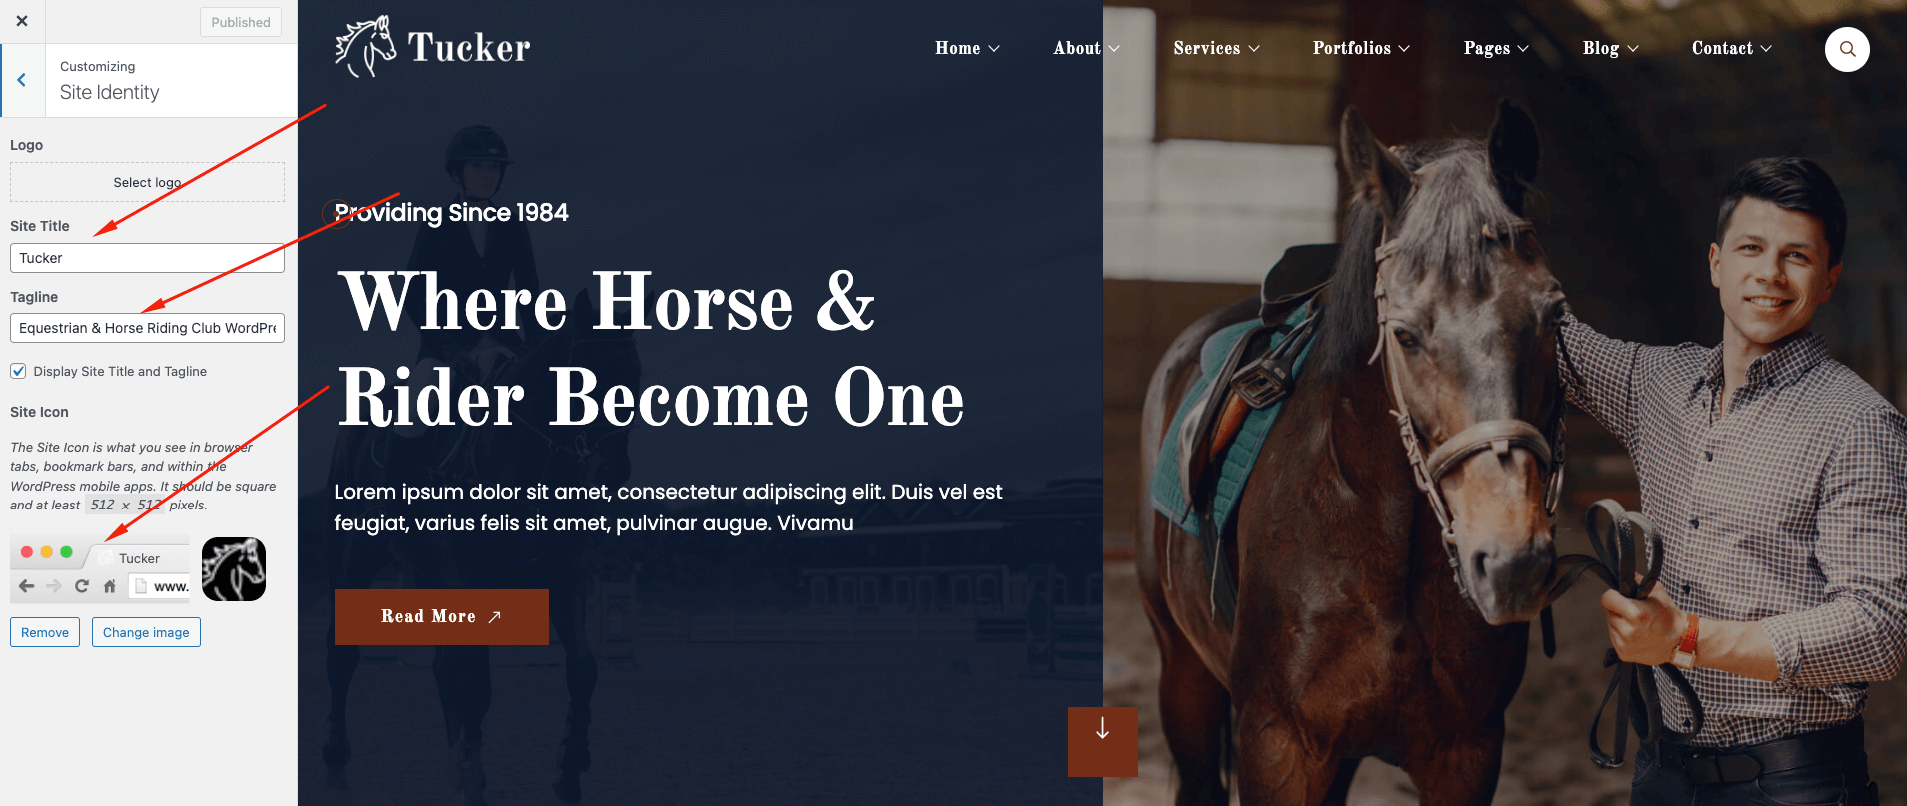
Change Site Title and Favicon
To change Site title and Favicon navigate to Dashboard Appearance Customize Site Identity and follow the following steps:
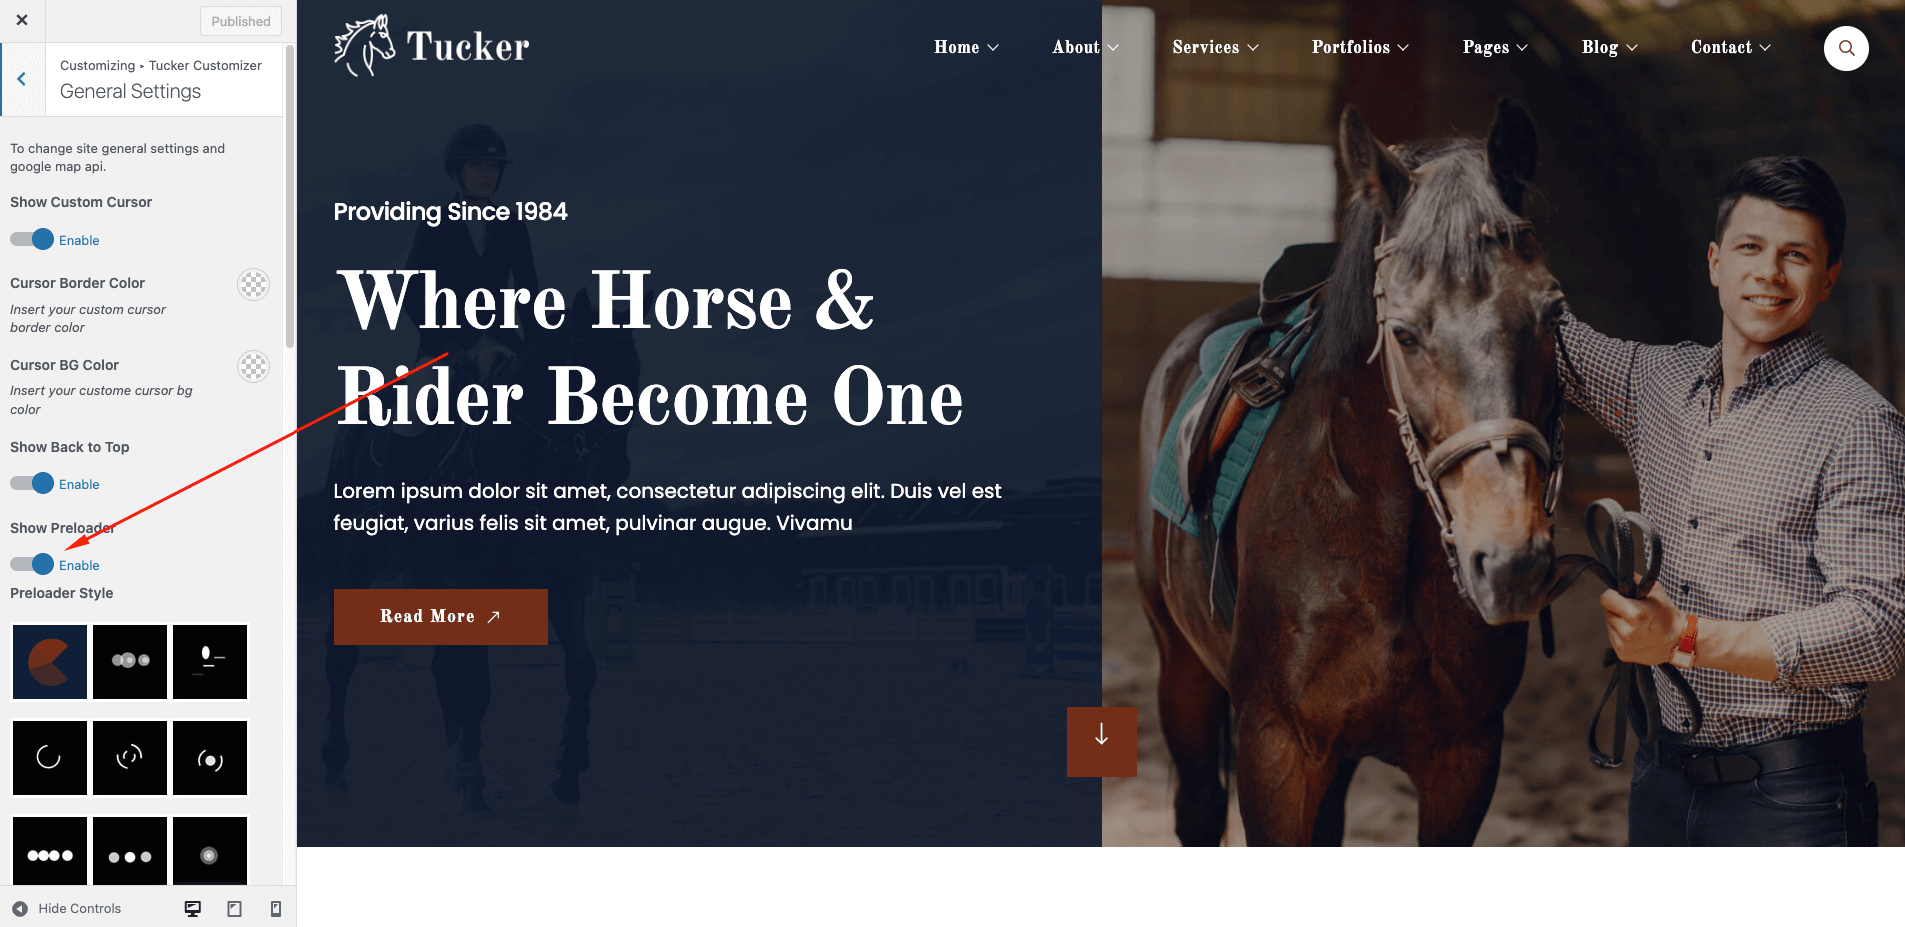
Preloader on / off
Navigate to Dashboard Appearance Customize Tucker Customizer General Settings and follow the following steps:
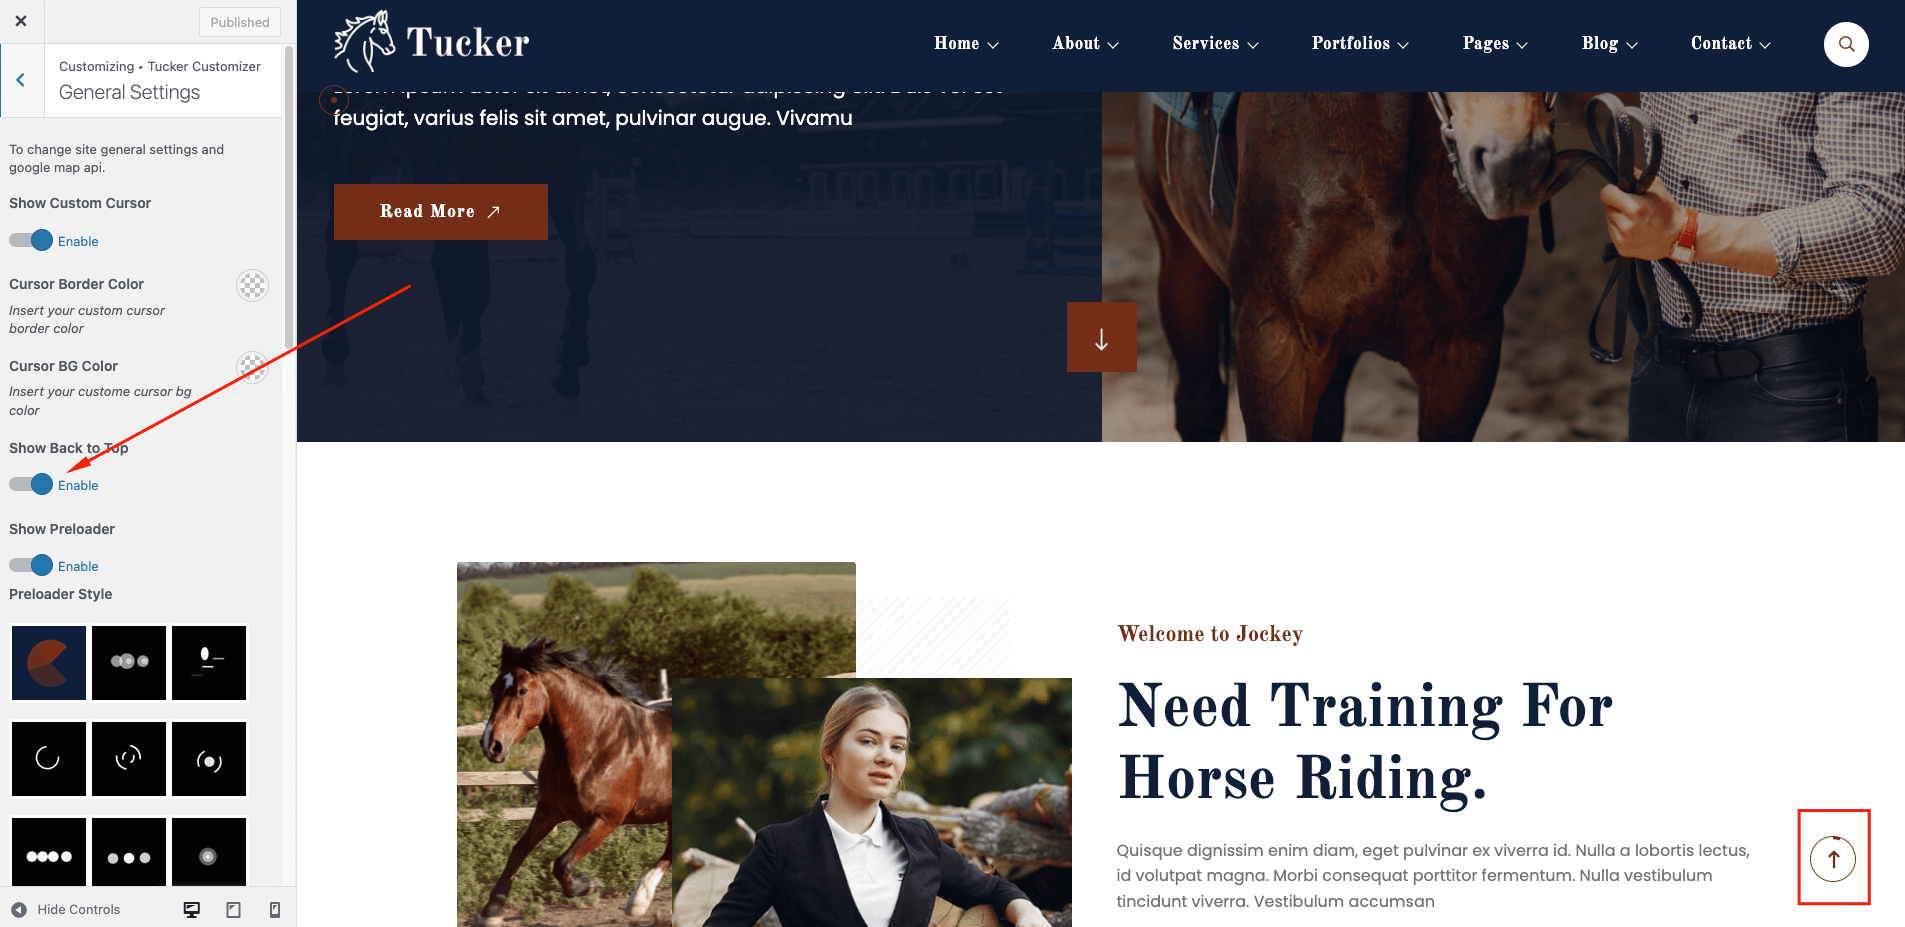
Back to top on / off
Navigate to Dashboard Appearance Customize Tucker Customizer General Settings and follow the following steps:
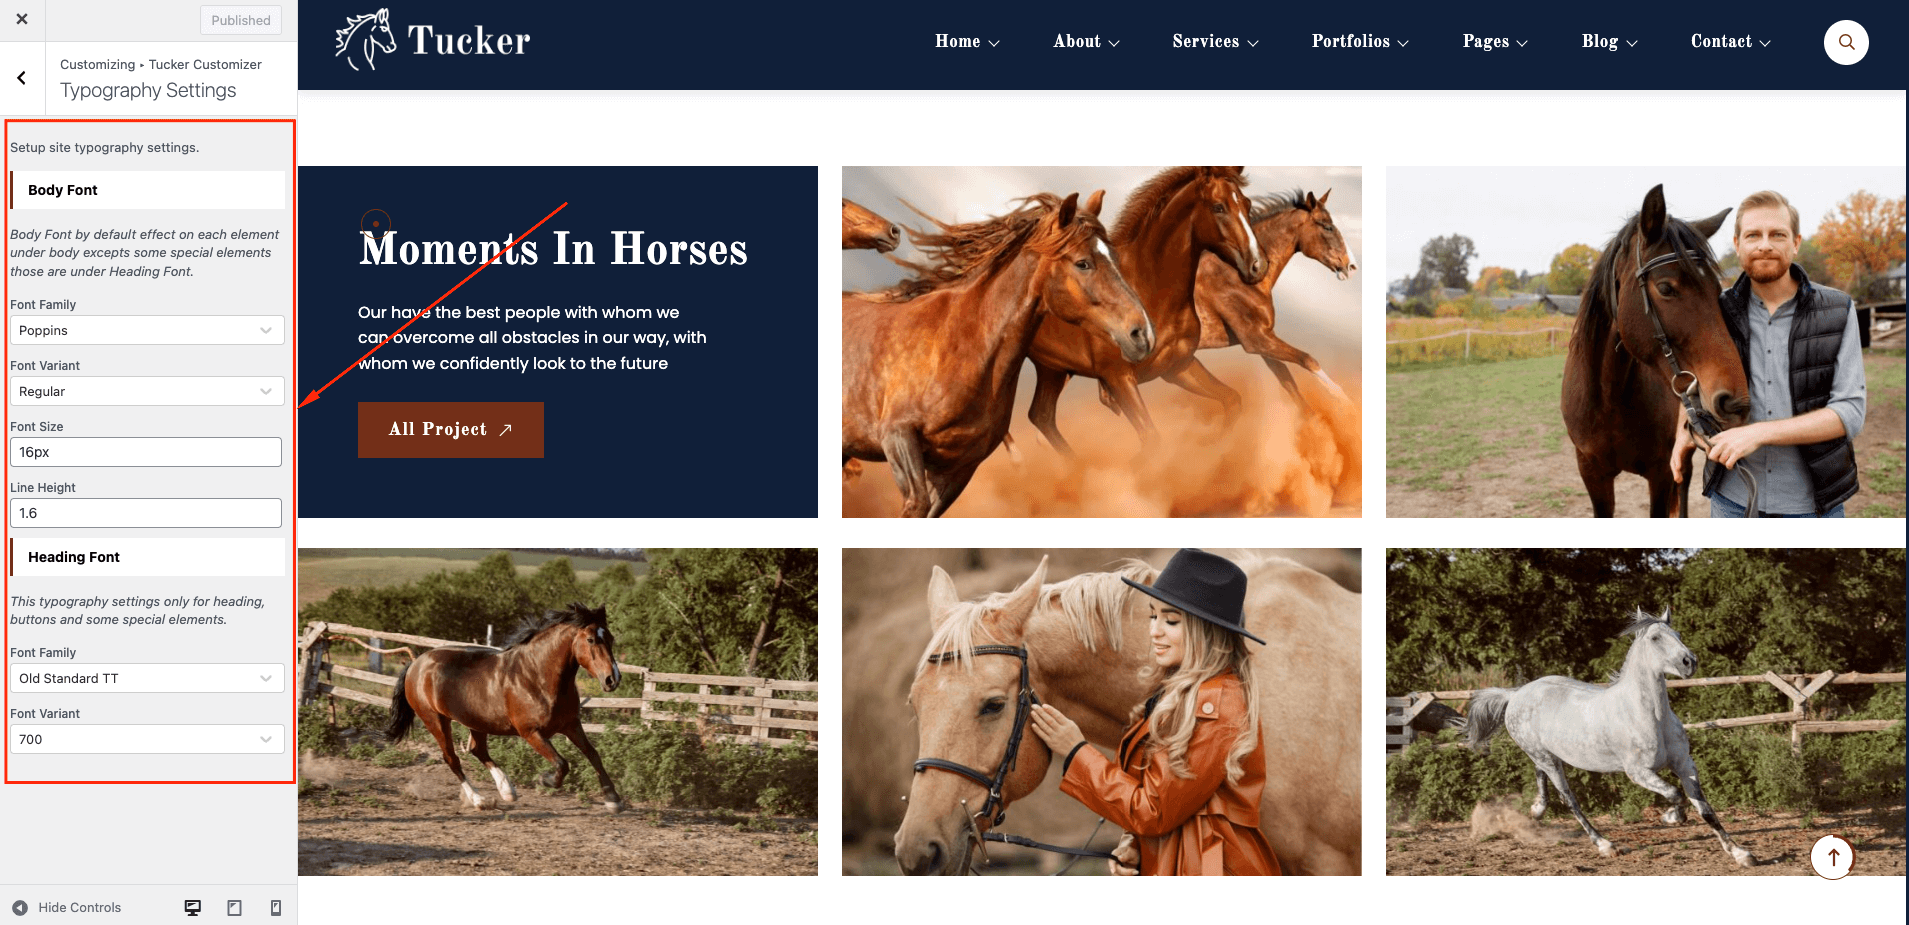
Typography Settings
Navigate to Dashboard Appearance Customize Tucker Customizer Typography Settings and follow the following steps:
Color Settings
Navigate to Dashboard Appearance Customize Tucker Customizer Color Settings and follow the following steps:

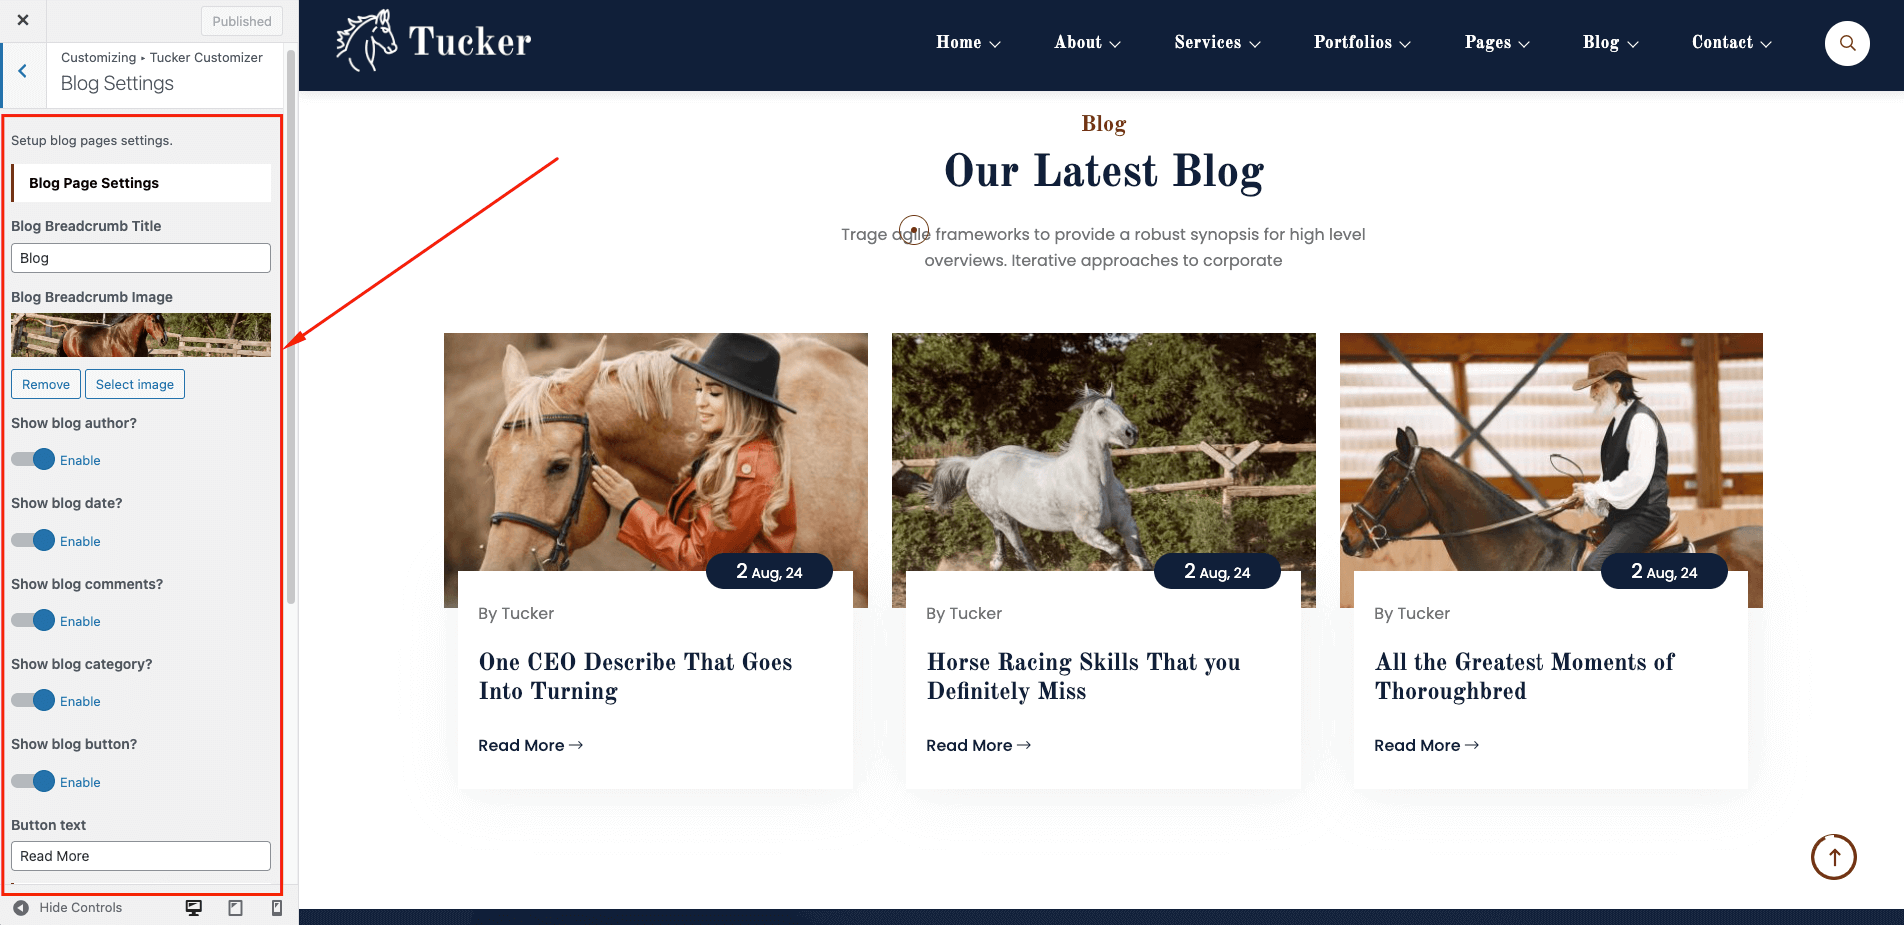
Blog Settings
Navigate to Dashboard Appearance Customize Tucker Customizer Blog Settings and follow the following steps:
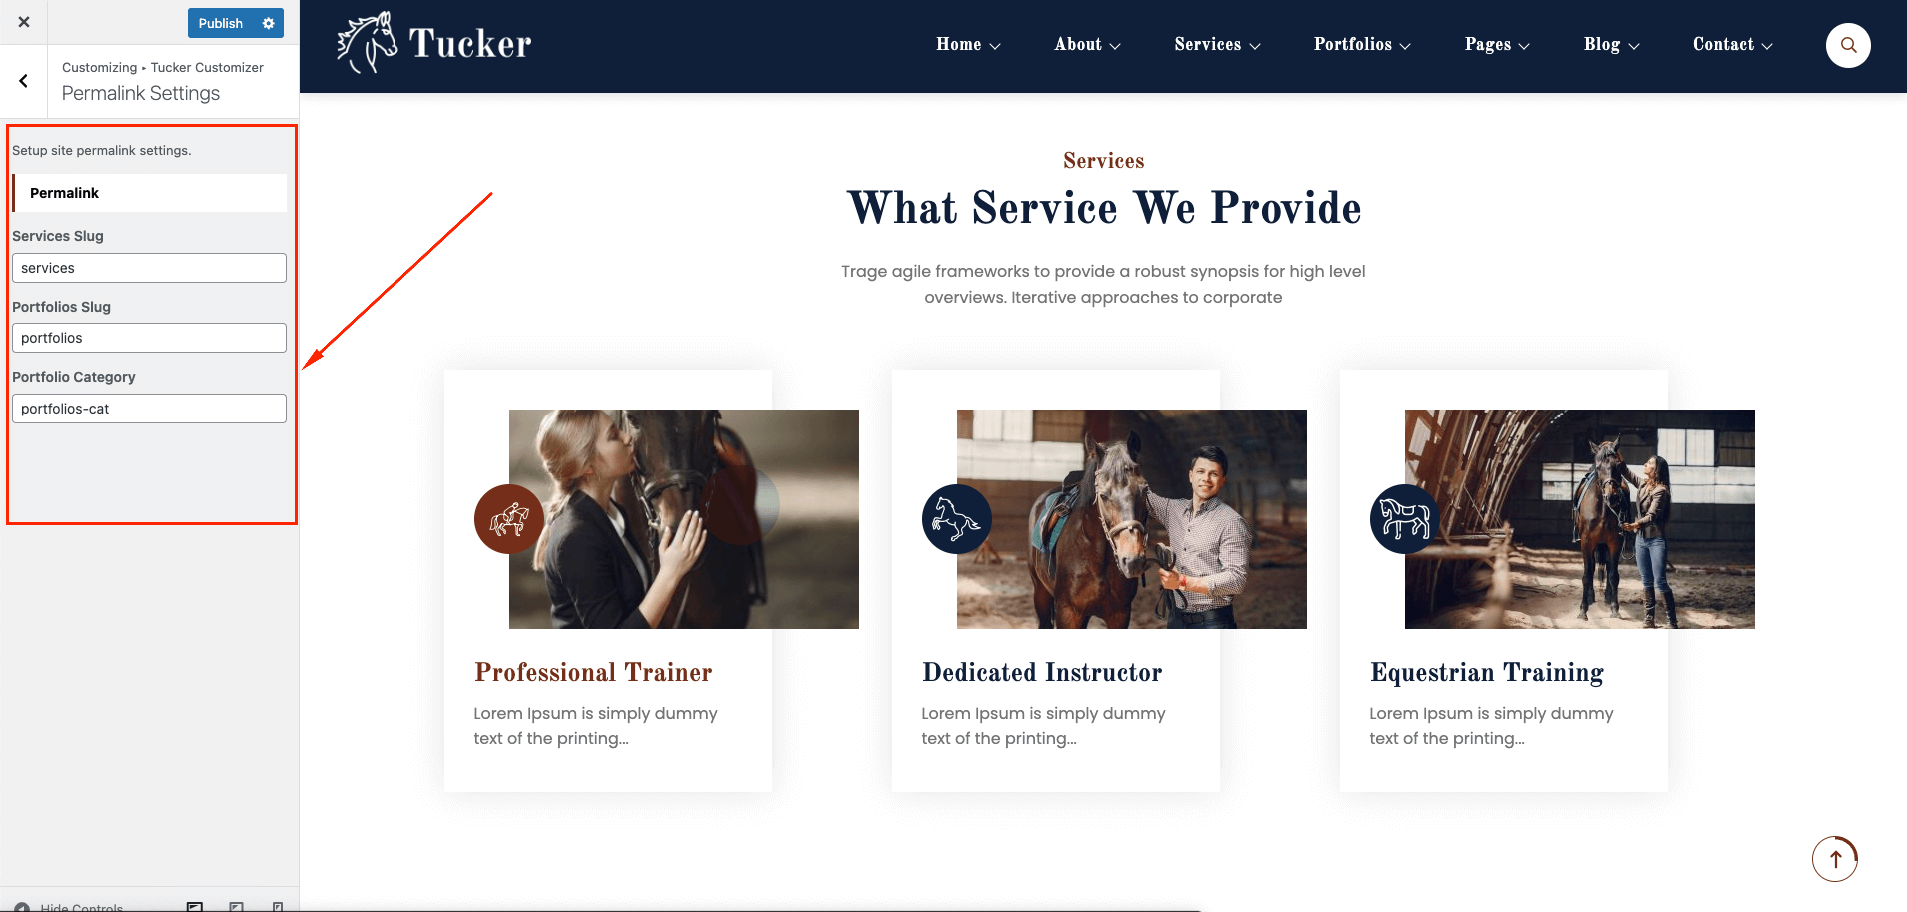
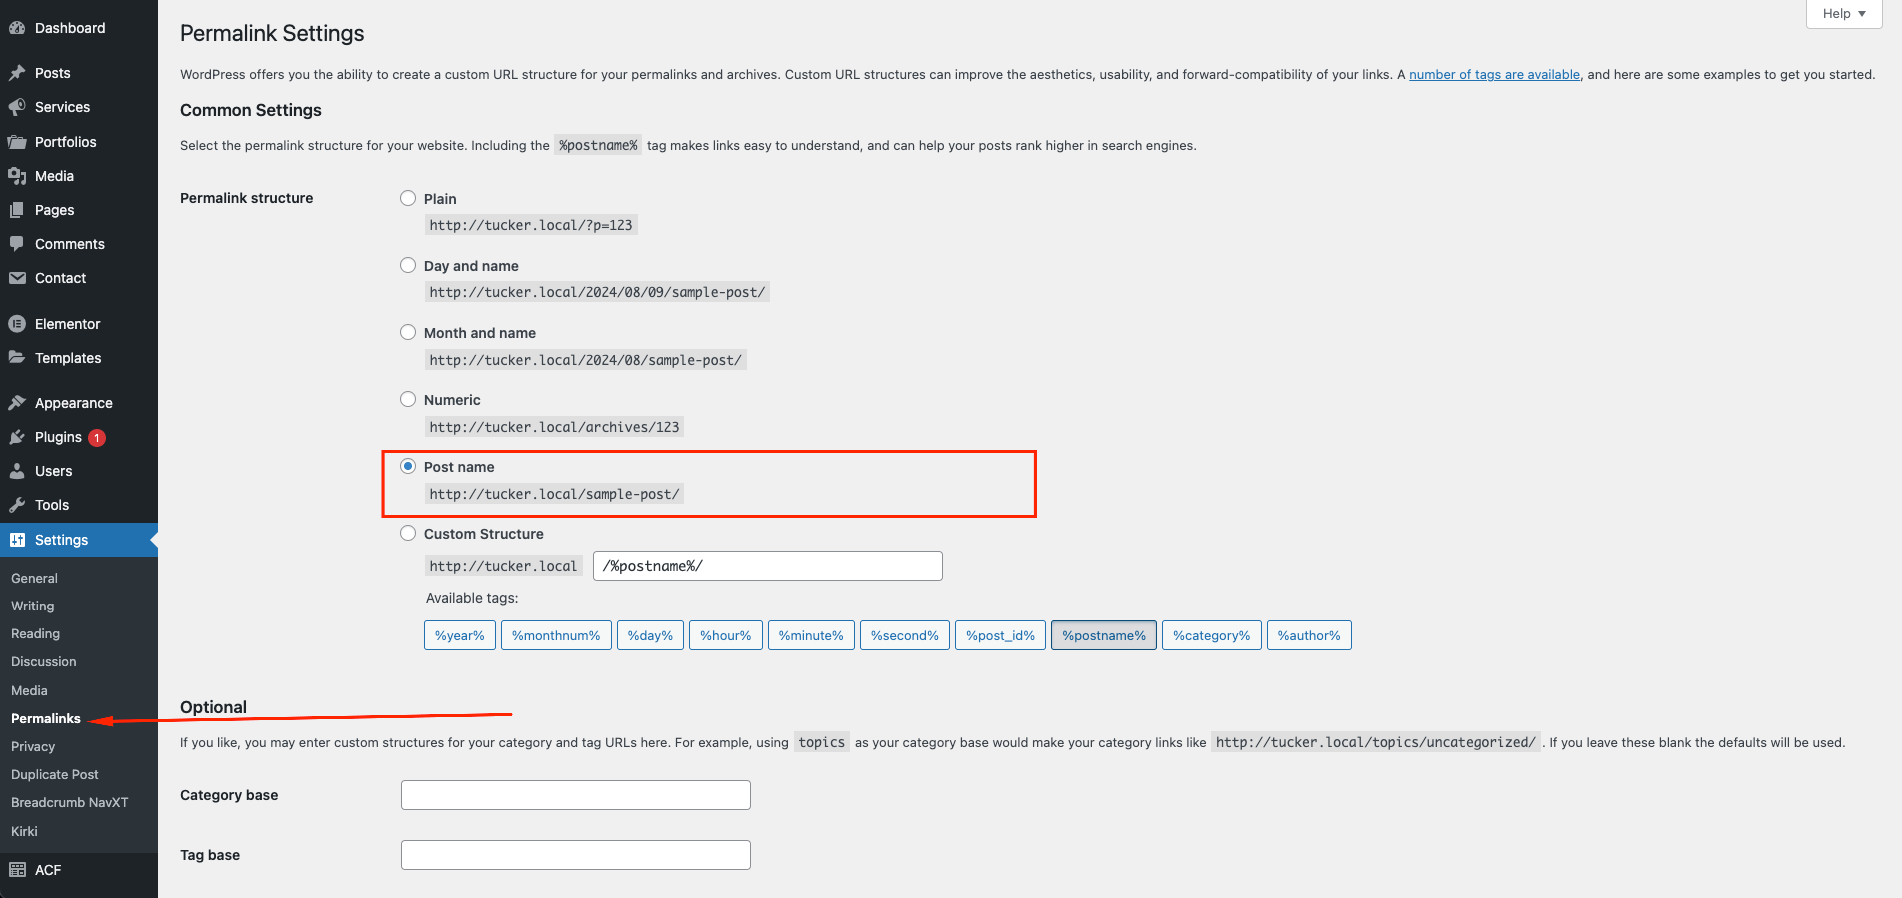
Permalink Settings
Navigate to Dashboard Appearance Customize Tucker Customizer Permalink Settings and follow the following steps:
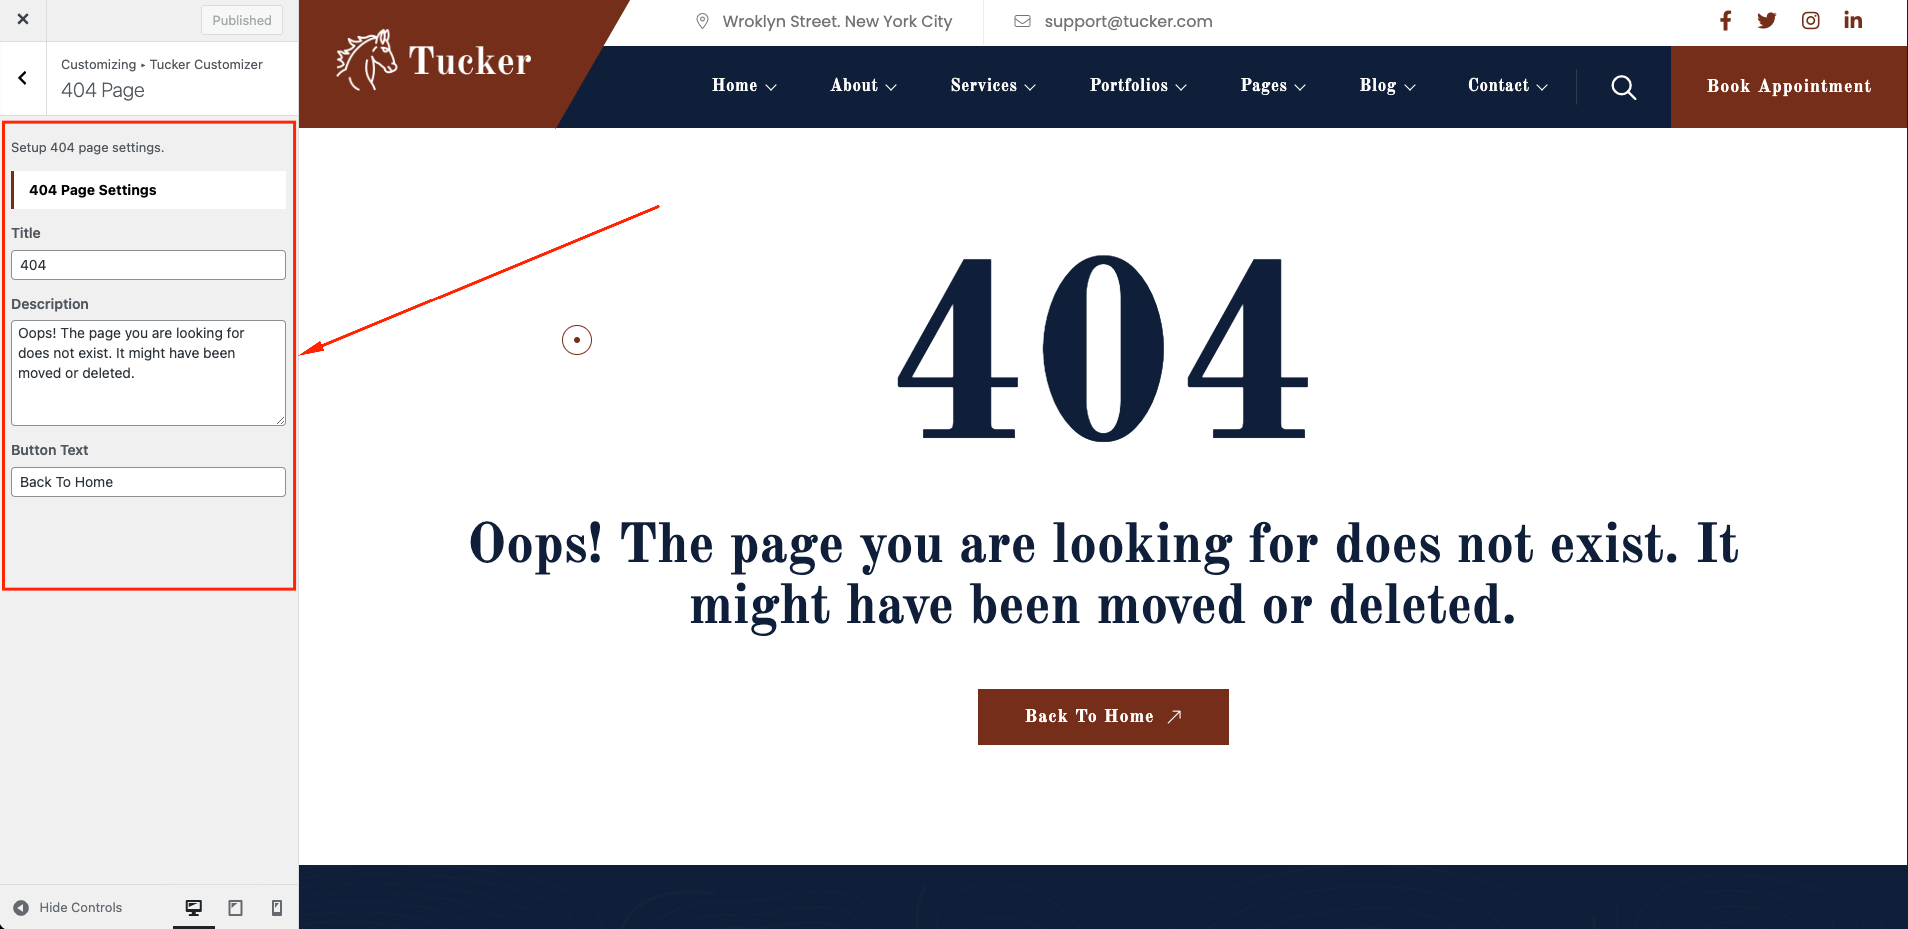
404 page Setting
Navigate to Dashboard Appearance Customize Tucker Customizer 404 Page and follow the following steps:
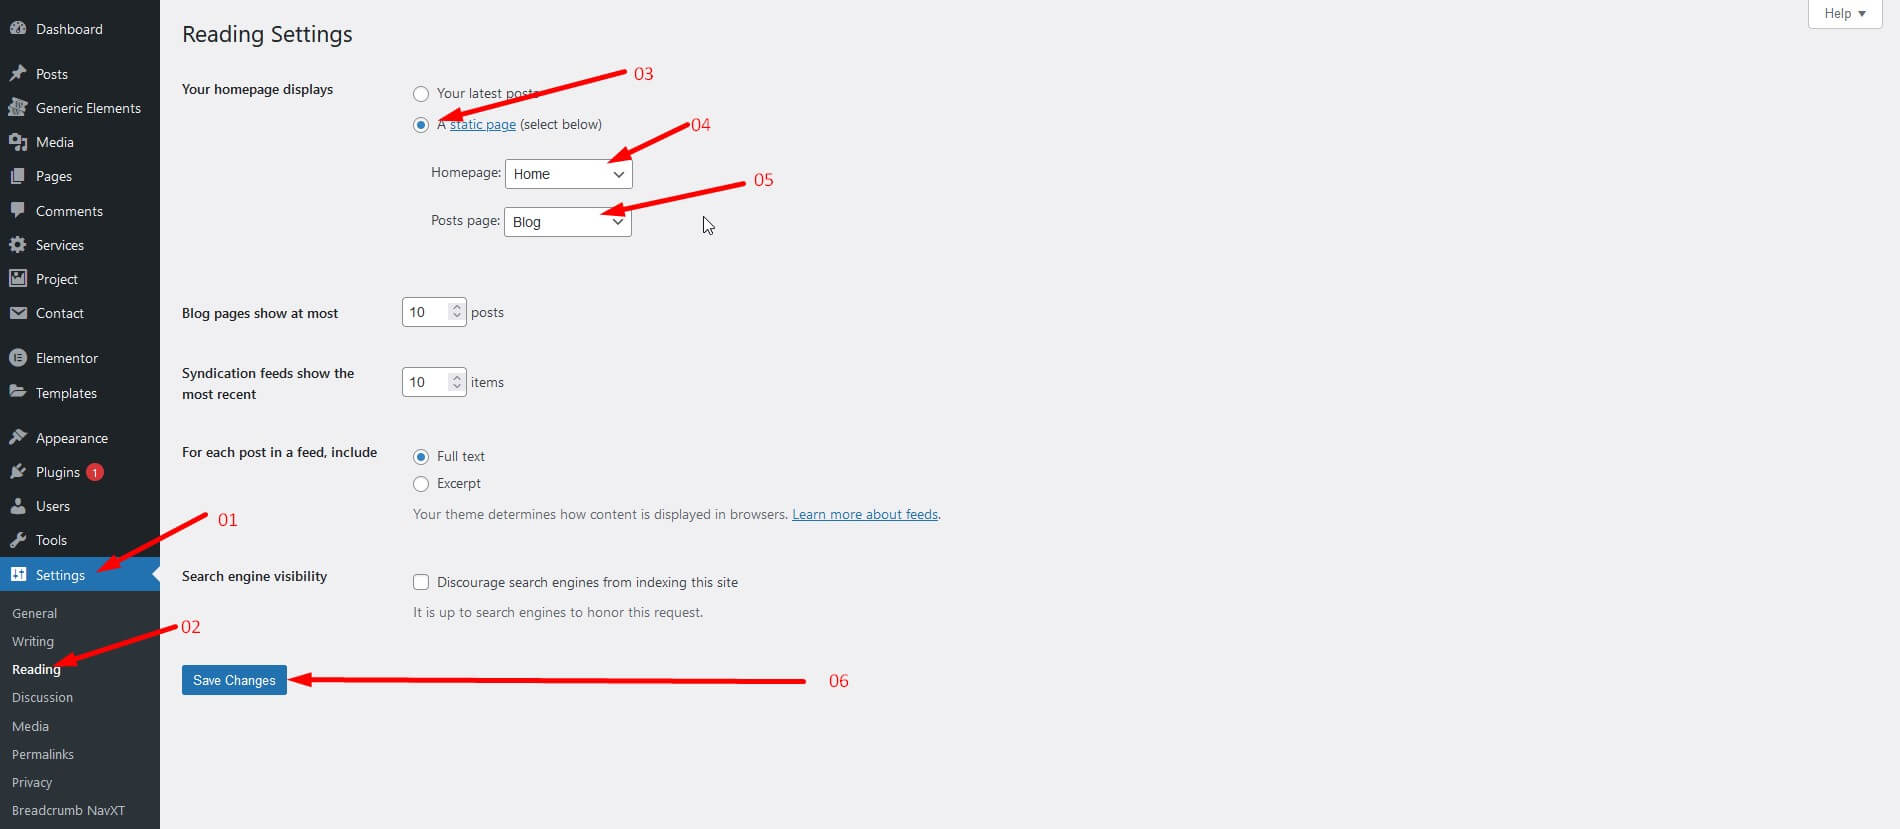
Home and Blog page setting
Navigate to Dashboard Settings Reading and follow the following steps:
Customize Menu
Navigate to Dashboard Appearance Menus and follow the following steps:

Elementor Options
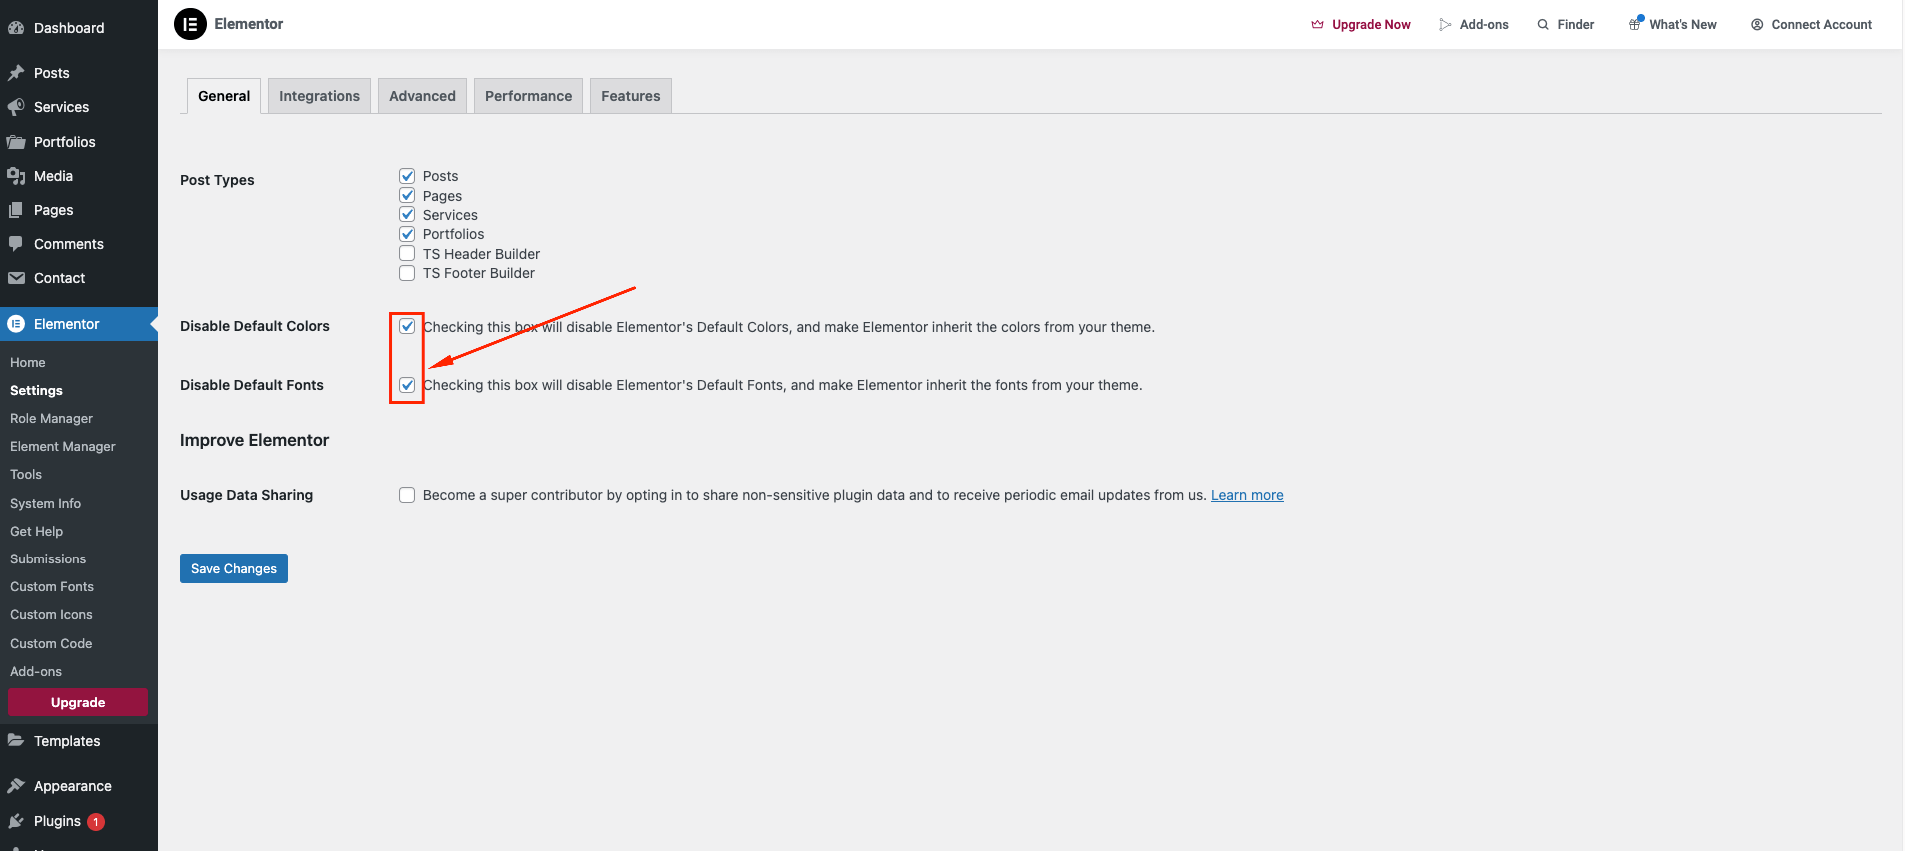
Disable Elementor Default Colors & Fonts
To disable Elementor Default Colors & Fonts navigate to Dashboard Elementor Settings General Checked both and follow the following steps:
Elementor Fontawesome Icons:
If Fontawesome icon not show properly / style not work / show svg icon
Navigate to Dashboard Elementor Settings Features Inactive -> Inline Font Icons and follow the following steps:
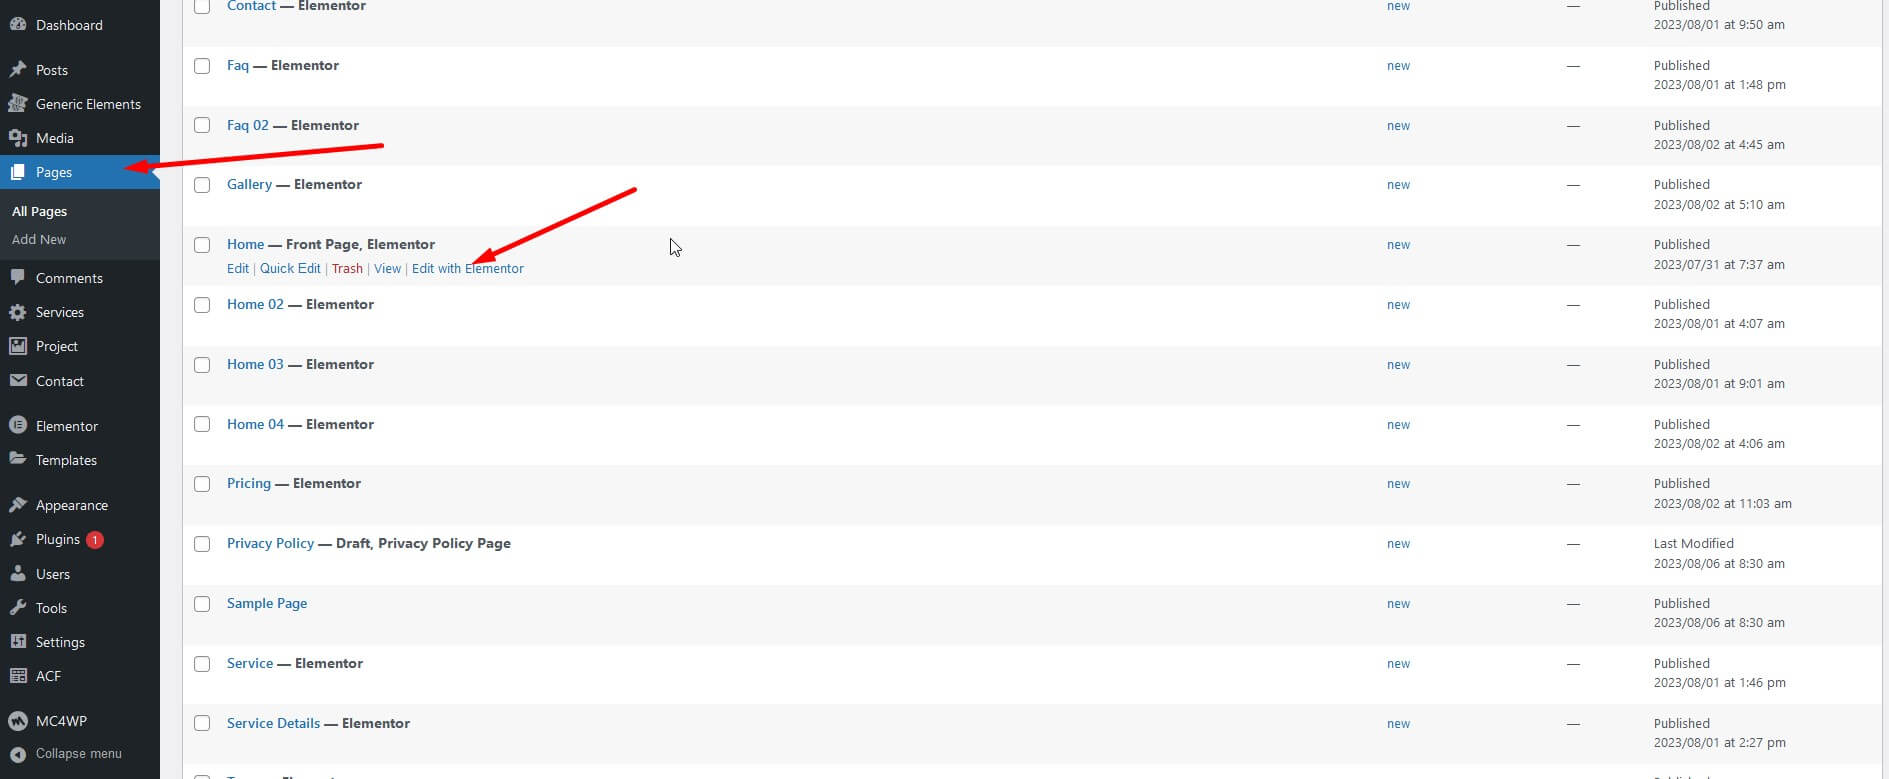
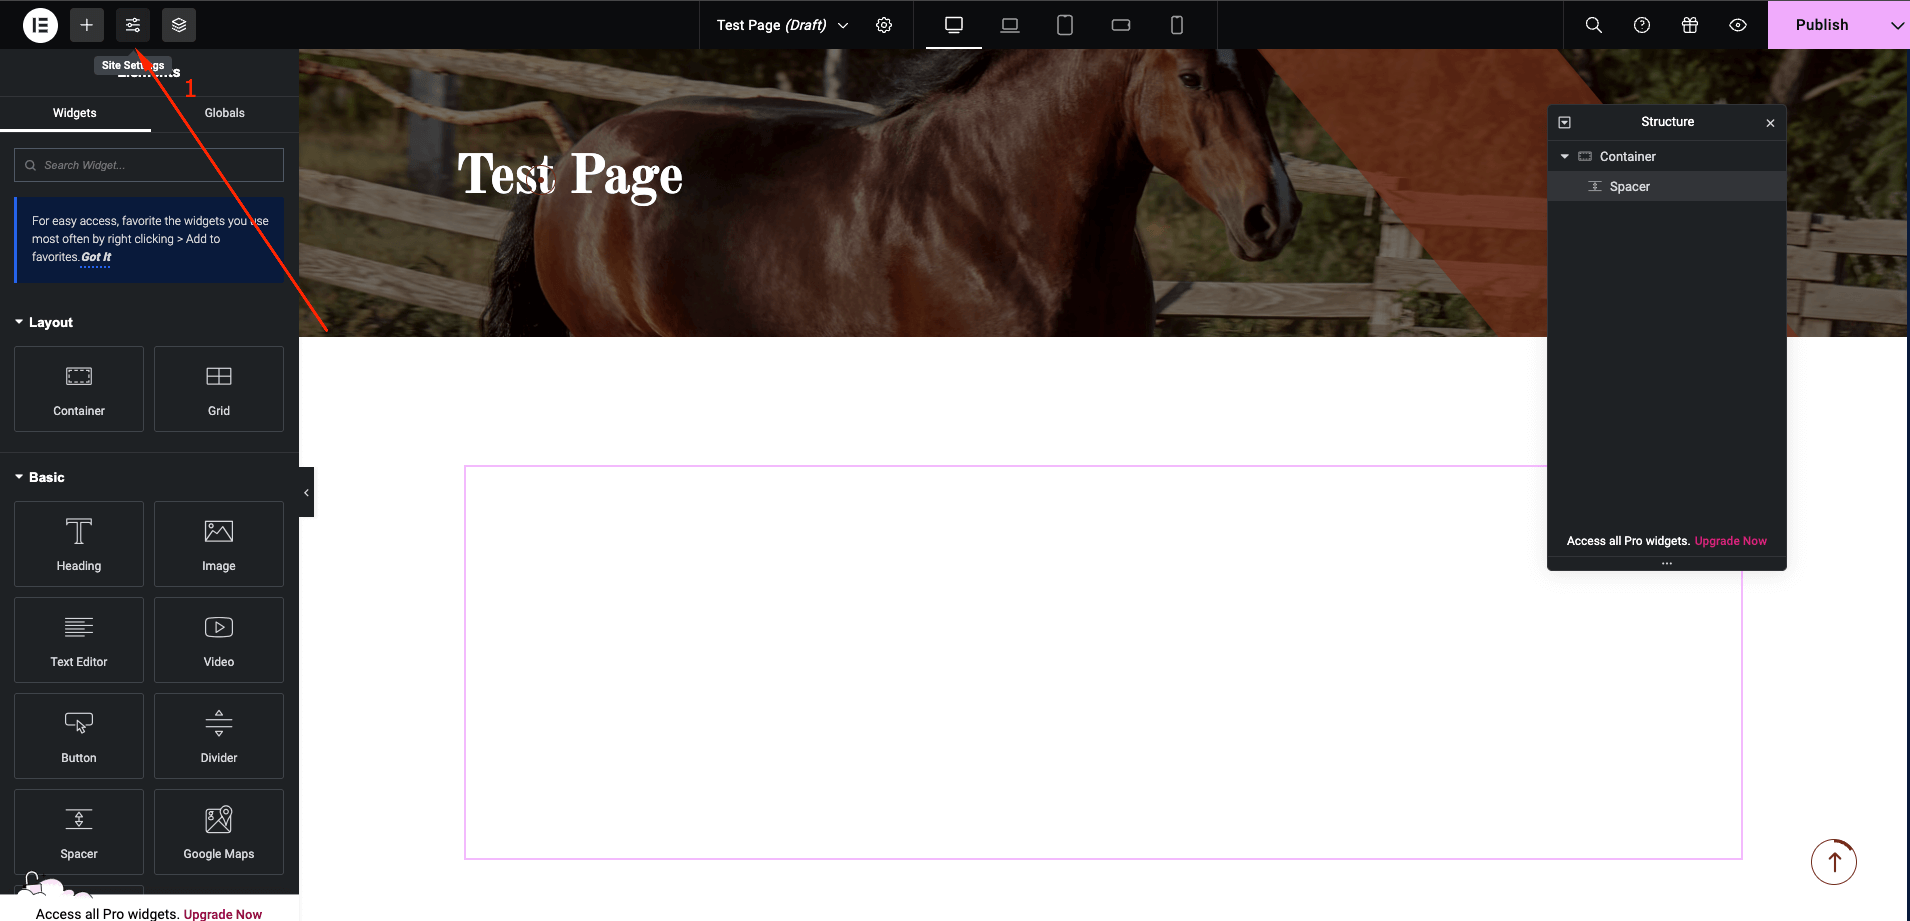
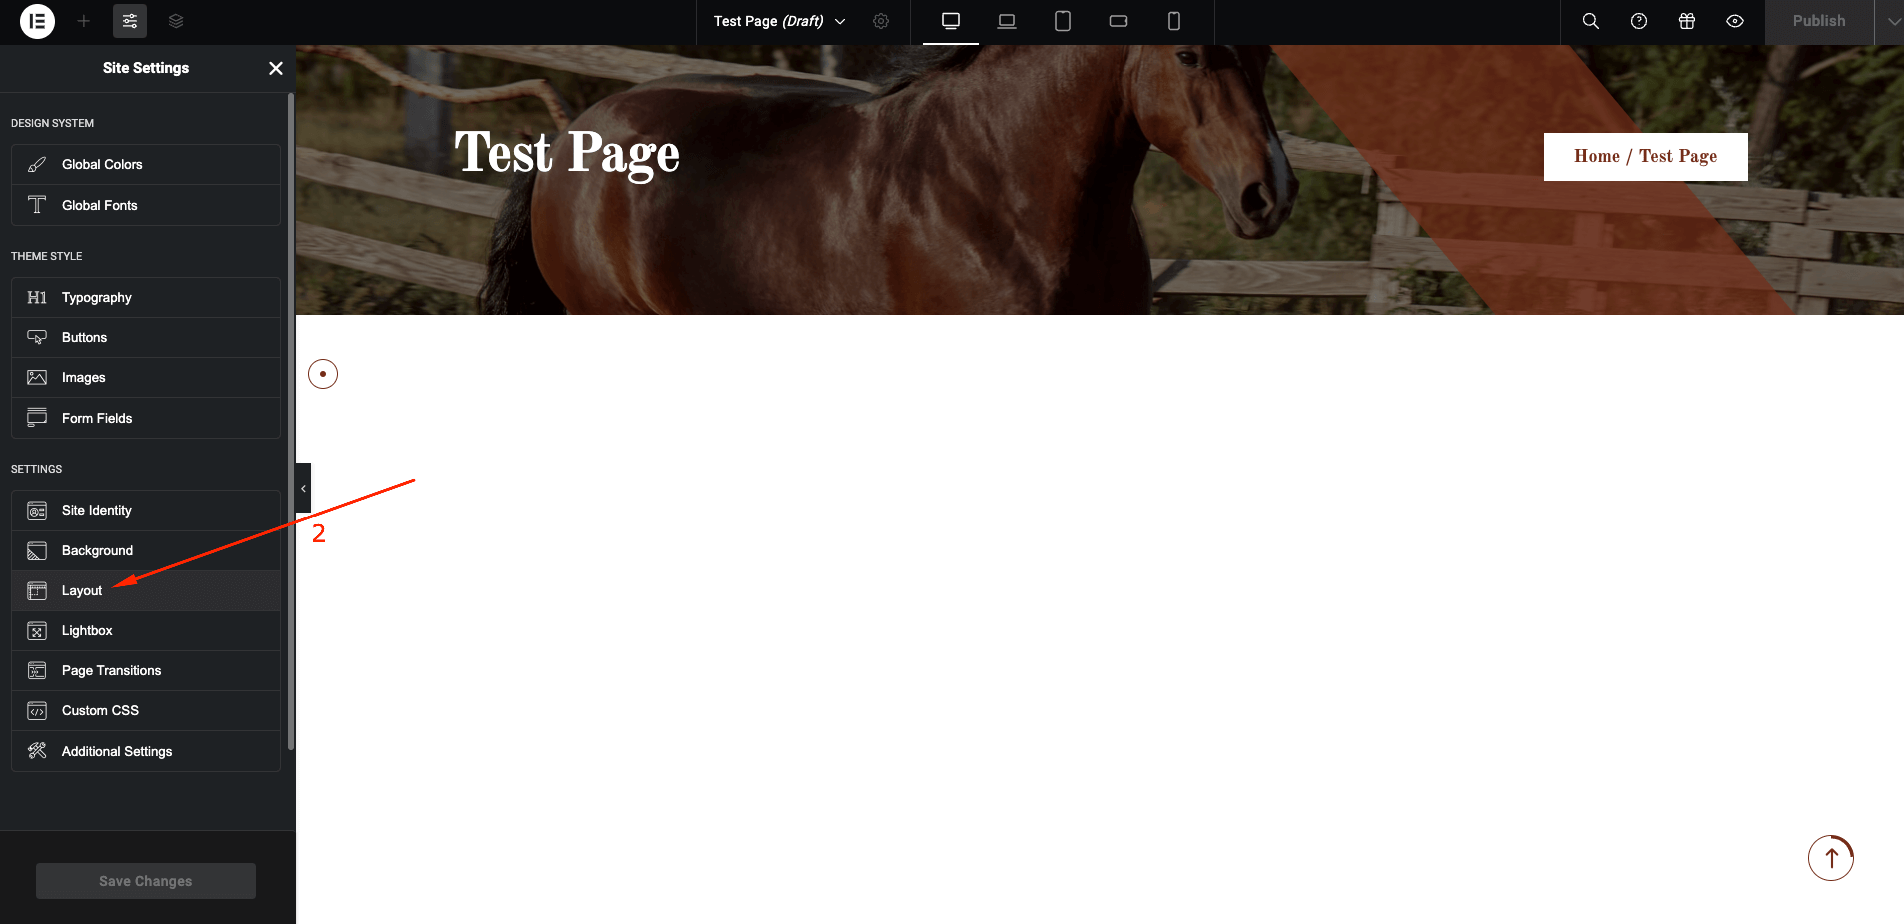
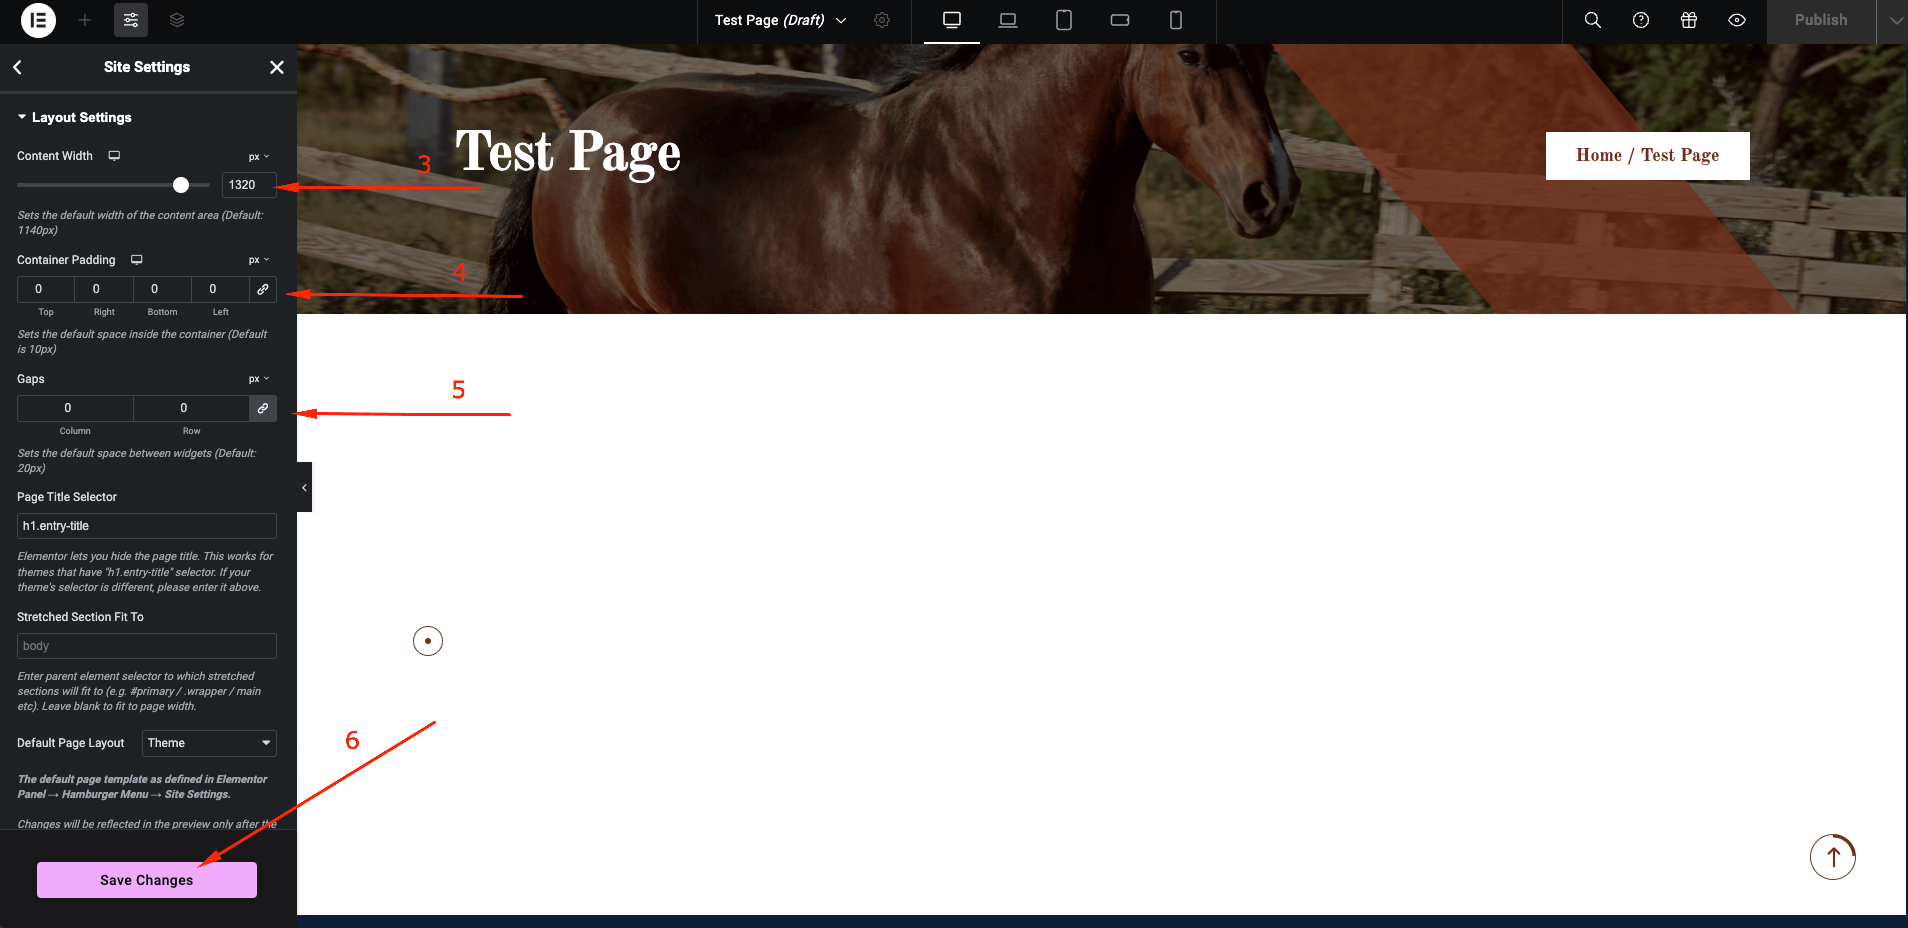
Customize Elementor Width
To change Customize Elementor Width navigate to Dashboard Pages Home(Edit with elementor) Let Top Bar Site Settings Layout Change Content width, container padding & gaps and follow the following steps:
Enable Elementor for Custom Post Types
- Navigate to the Elementor General from admin dashboard menu.
- Select the post types you want to enable Elementor from Post Types field.
- Click the Save Changes button after process is finished.
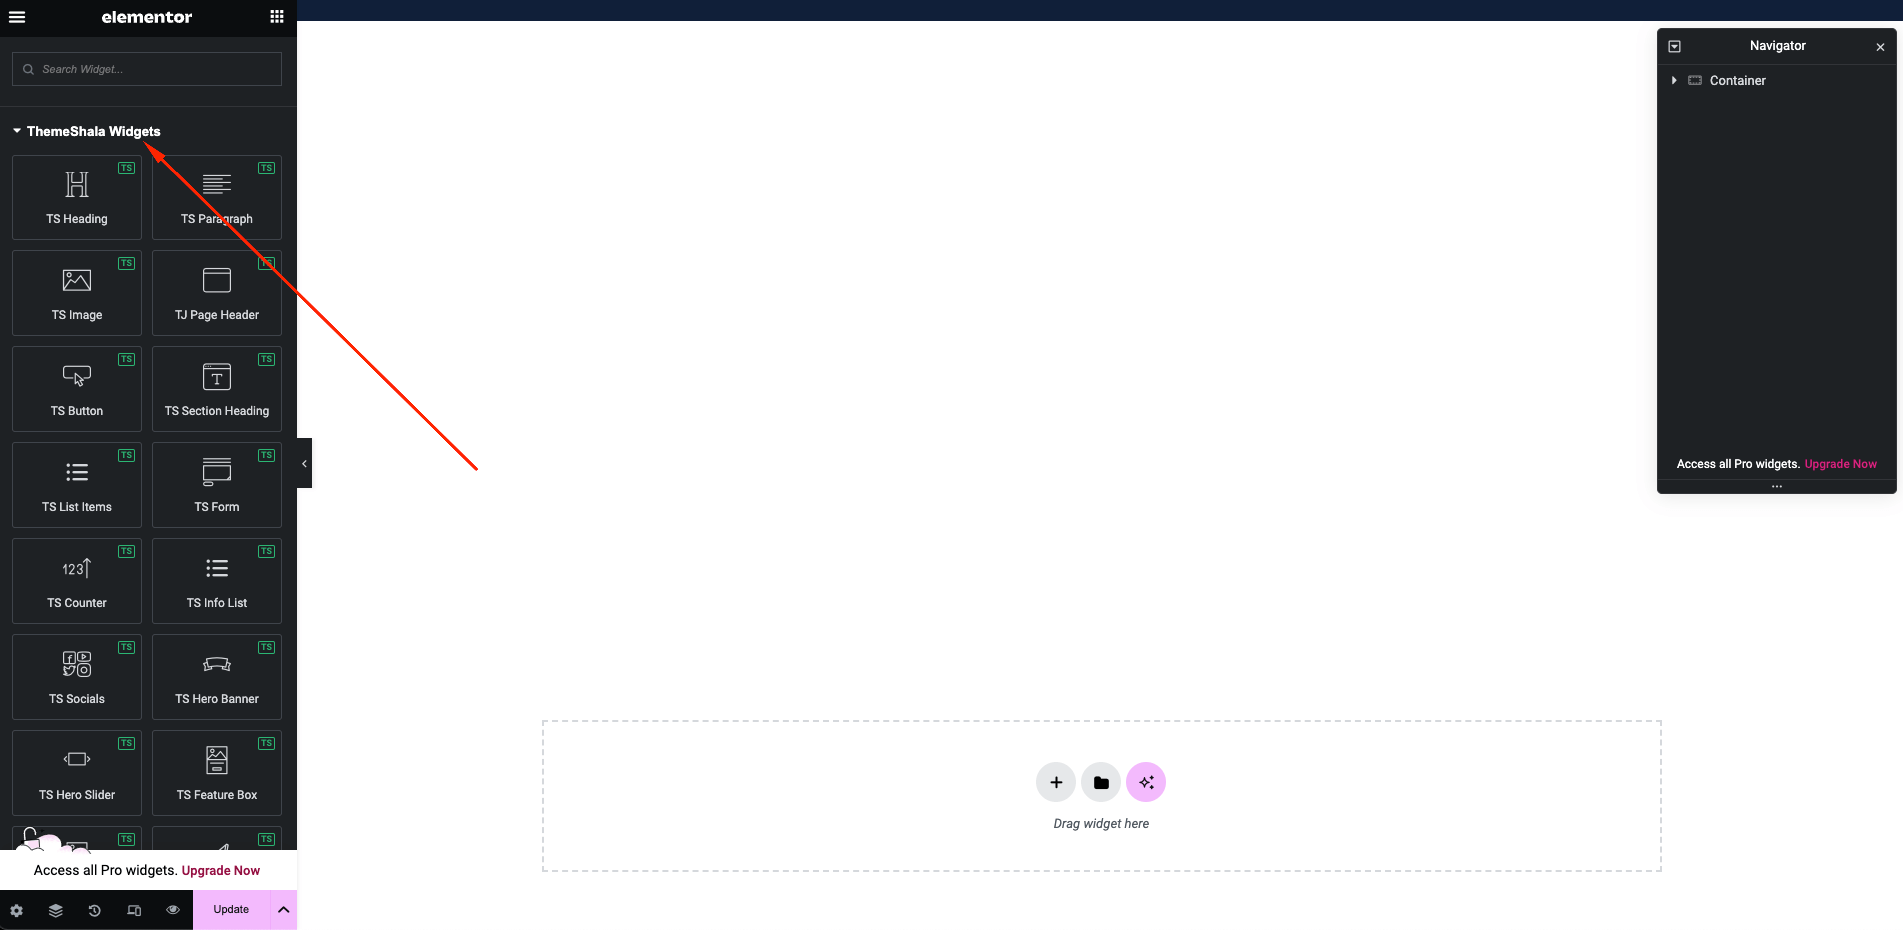
Elementor Widgets
Elementor Page Builder has a lot of built-in widgets by default. But we've created 30+ custom Elementor Widgets that you can use in your website and extend website functionality. You can find them under ThemeShala Widgets section on Elementor edit mode.
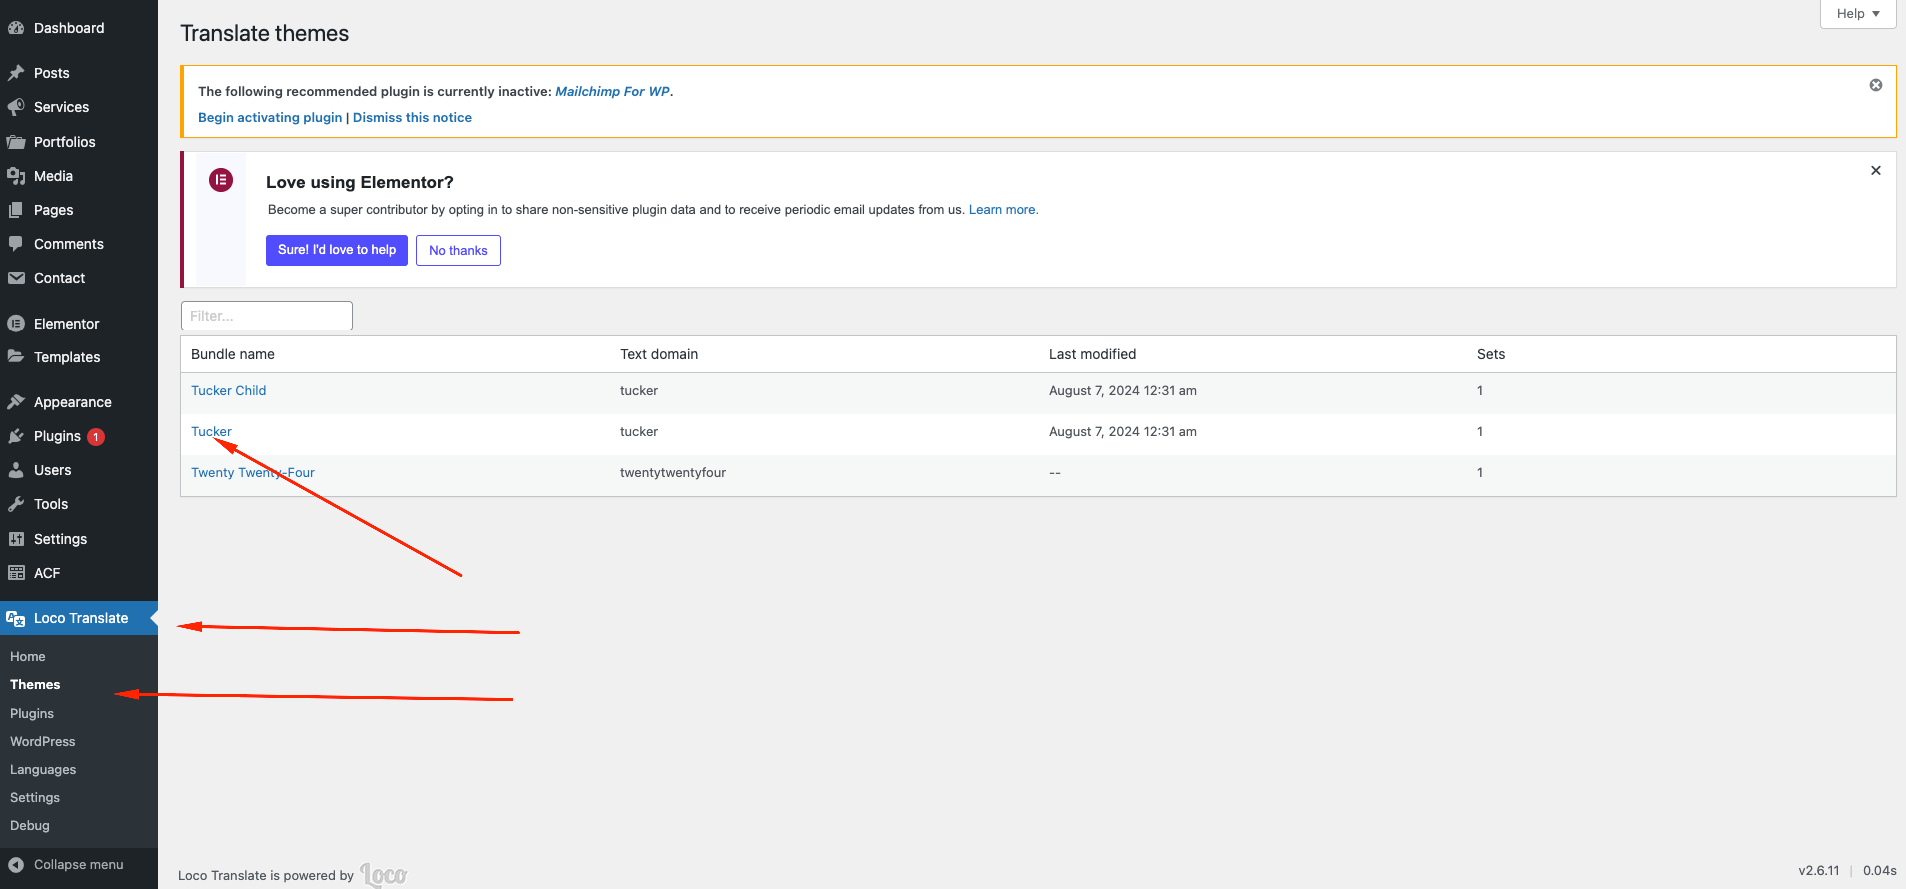
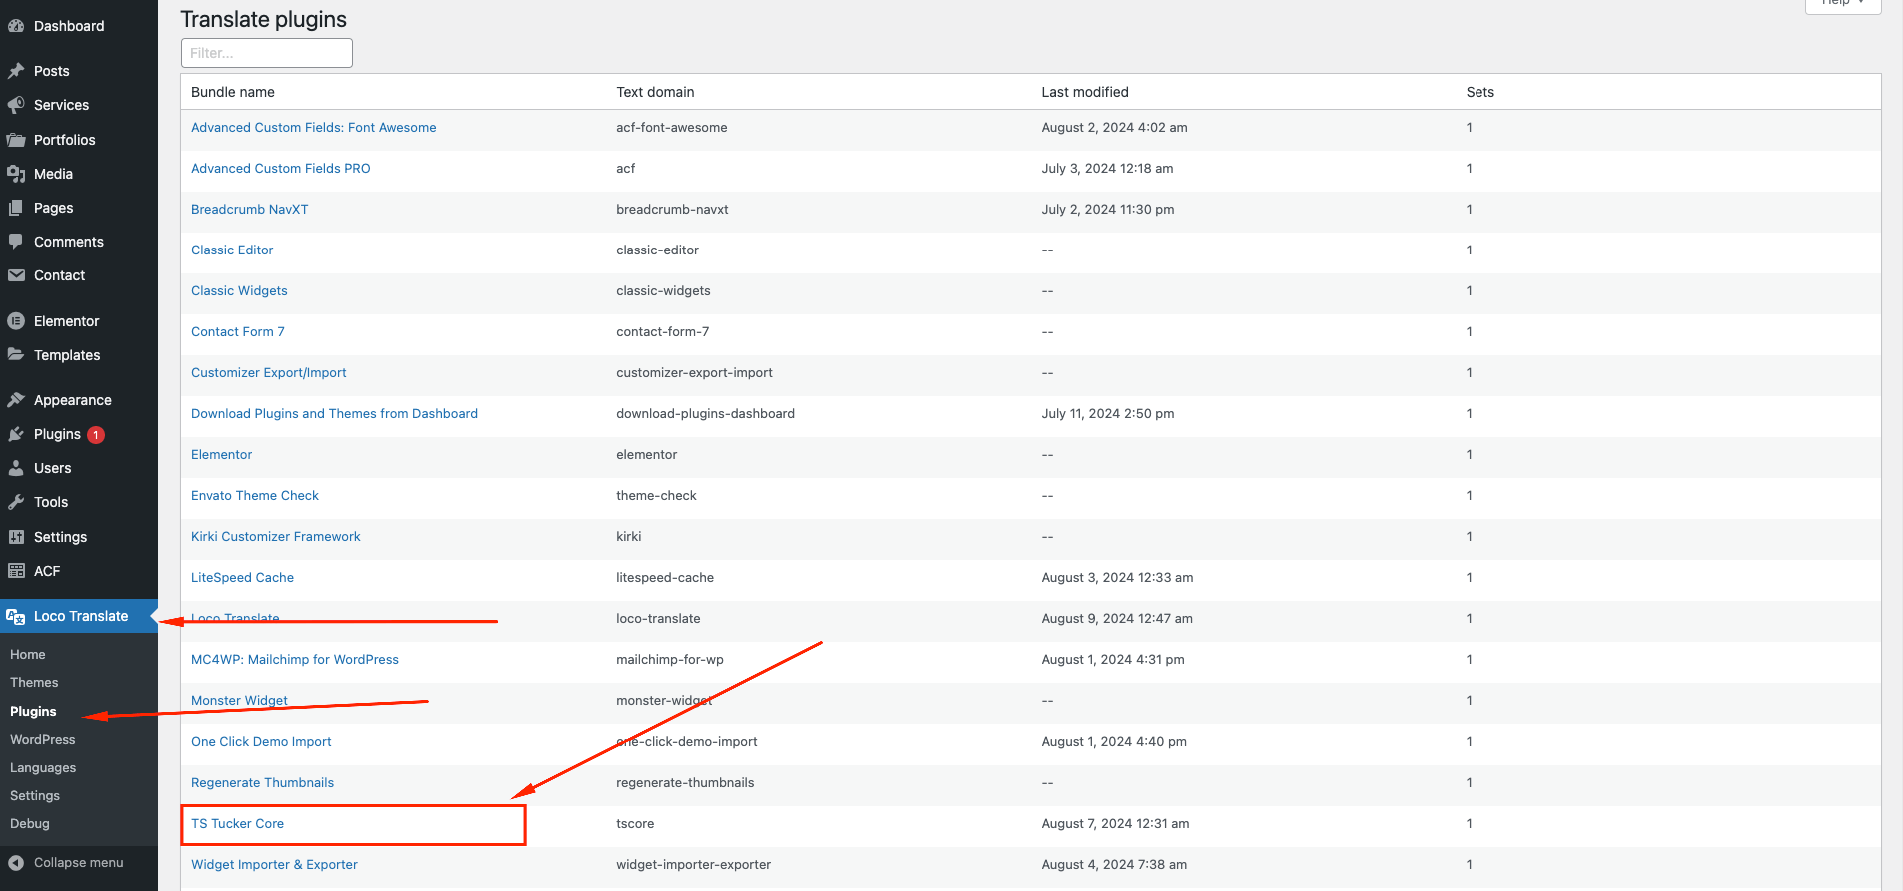
Translating Theme
You can translate this theme to another language easily. You have to translate several things for your website to work properly:
- Theme: Tucker
- Plugin: TS Tucker Core
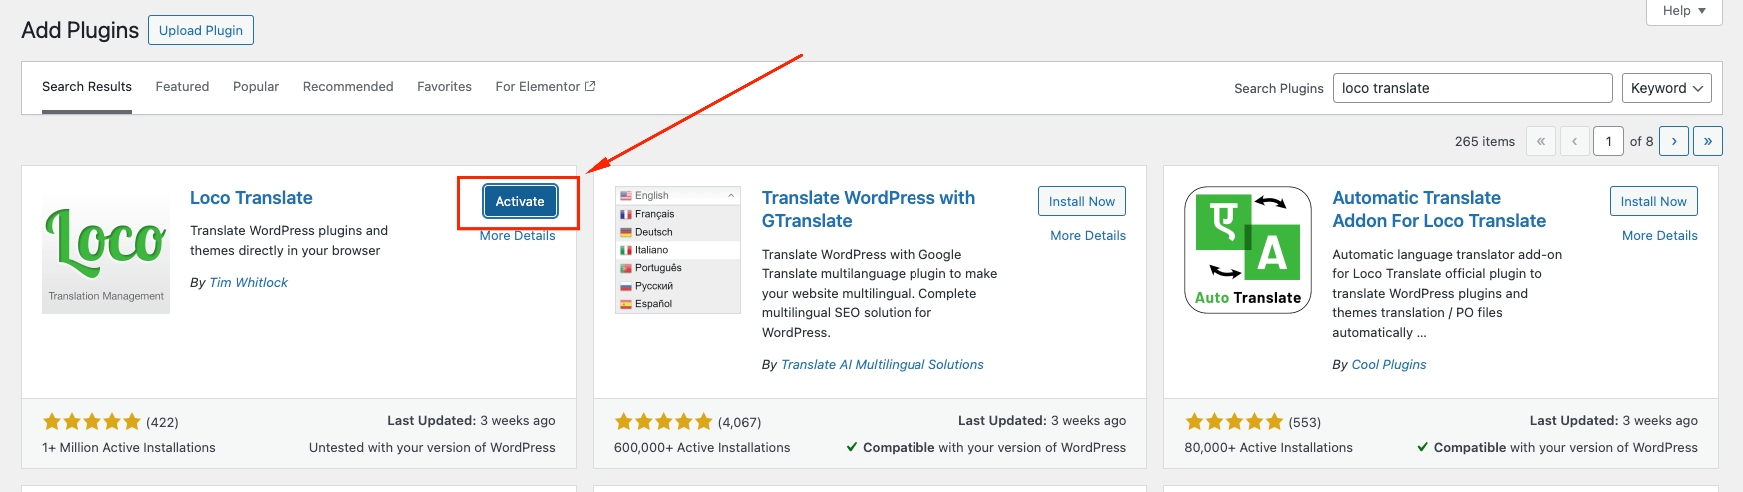
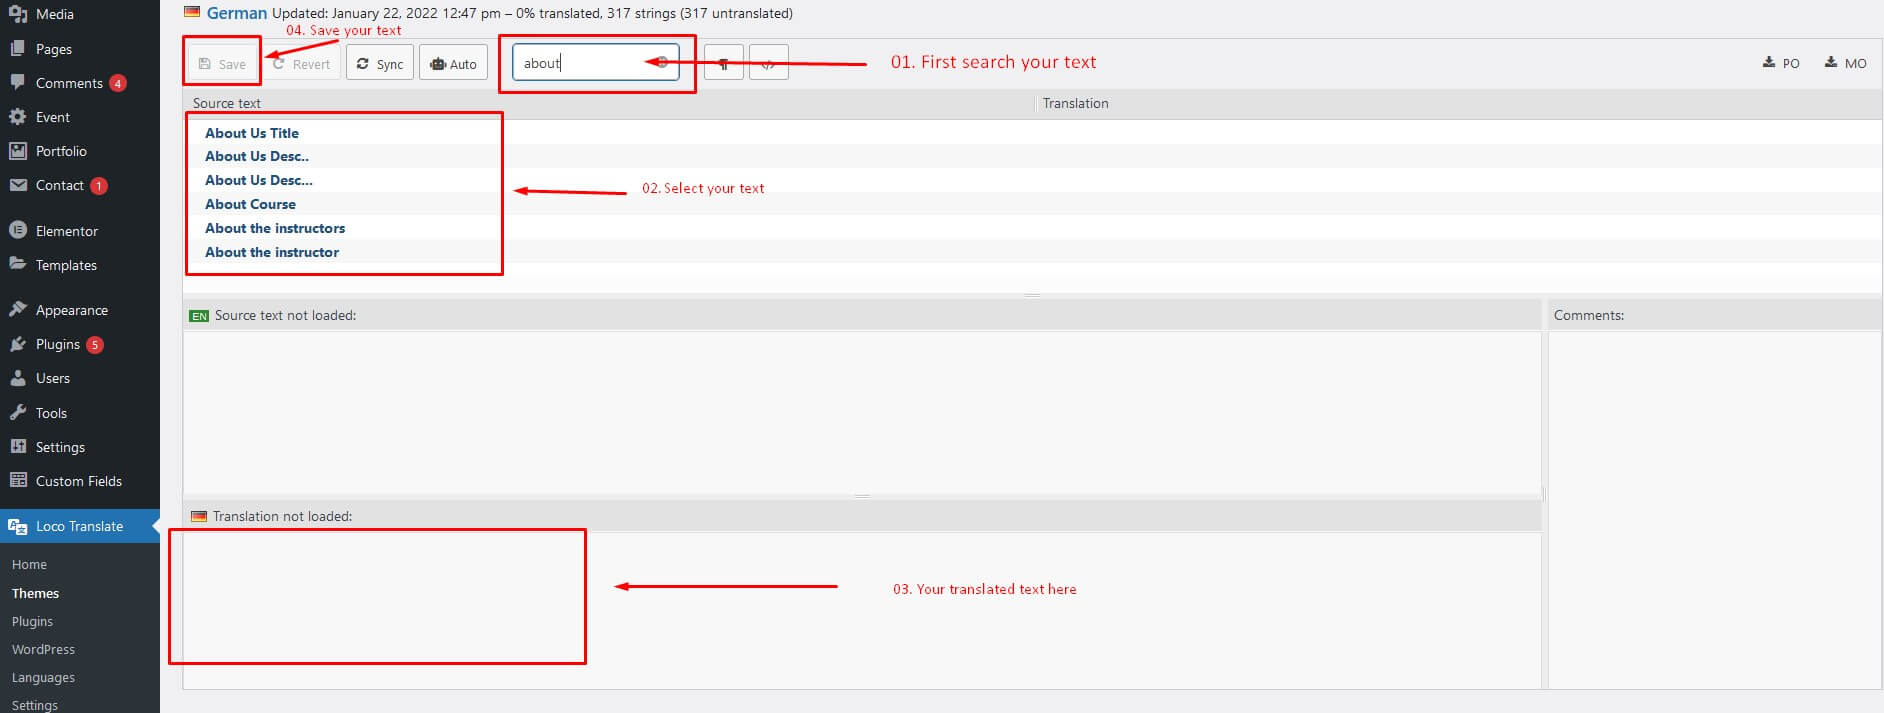
There are many tools available for translation. But the easiest way is to use plugin Loco Translate. Using this plugin, you can literally translate any WordPress themes or plugins if it supports translation.
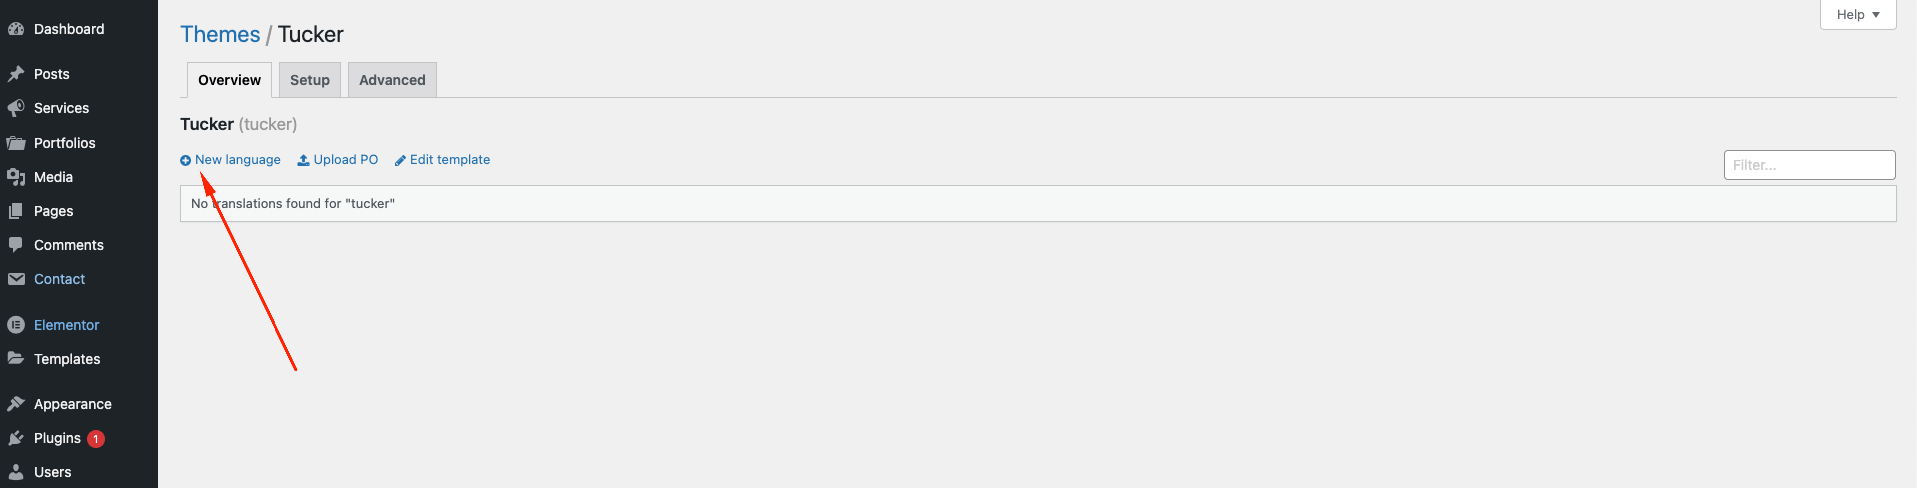
Here's a step by step tutorial about translating any themes and plugins using "Loco Translate"
- Install and activate plugin "Loco Translate".
- Select the Theme or Plugin you want to translate from "Loco Translate" menu
- Theme Translate { Tucker }
- Plugin Translate { TS Tucker Core }
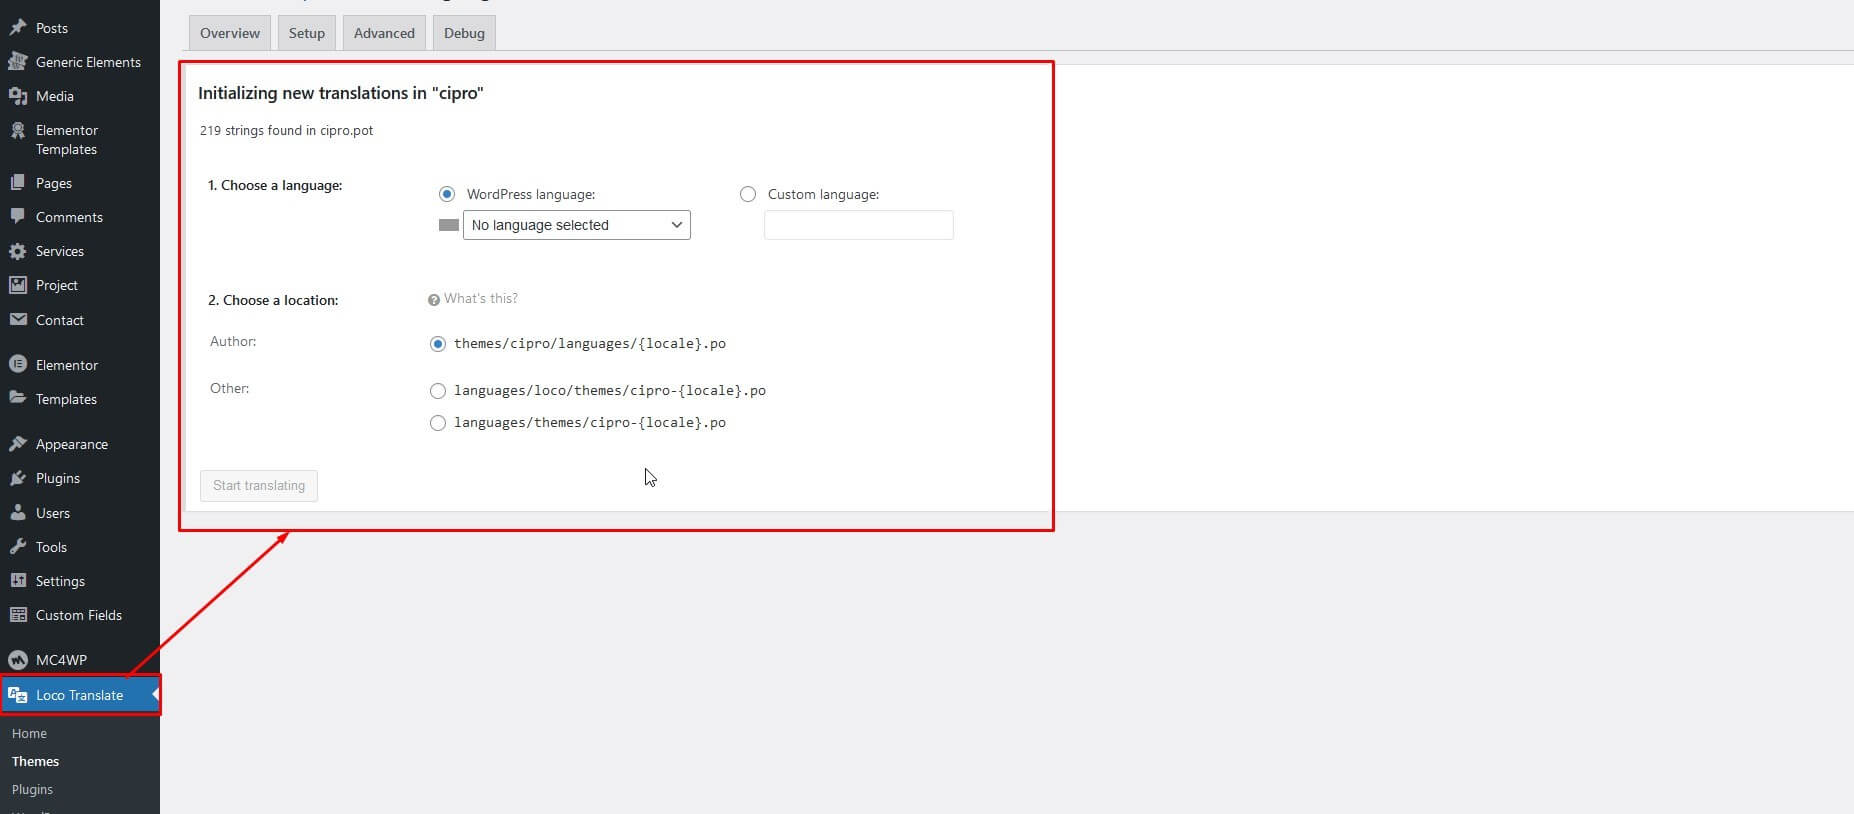
- Click on New language link
- Select your preferred language, and also select your location as "System". Then click on "Start Translating" button.
Here's a quick video tutorial about how to use Loco Translate:
Updating Theme
We recommend that you use the Envato Market plugin to keep the theme up-to-date.
- Install and activate the "Envato Market" plugin manually. Here's the plugin zip file: http://envato.github.io/wp-envato-market/dist/envato-market.zip
- Navigate to Plugins Add New
- From WordPress Admin Panel, navigate to "Envato Market" menu.
- In this page, you'll find a field for Inserting Envato Token. Insert your
Envato
Token Code from there. You can generate this code from this link:
https://build.envato.com/create-token/?purchase:download=t&purchase:verify=t&purchase:list=t
.
Remember, while generating the token, you have to login using the same envato id which you used to purchase theme. - After completed the above steps successfully, Navigate to Appearance Themes. Here you'll see an "Update now" link beside your theme. Click on that link and your theme will be updated automatically
Here's a quick video tutorial explaining this method:
Demo Content Installation Failed
This is a hosting issue. In most hostings demo installation will work fine. But some hostings block certain permissions which may cause this issue. If this happens to you, you can contact your hosting provider or alternatively send a support request to our support team and we will help you to fix this.
404 Error in All Pages
If you face this type of issue, please update your permalink. To update permalink, navigate to Settings -> Permalink and then click on Save Settings button.
Contact Us
If you face any issue please contact us at Support . We provide 15 hours real-time support for our customers.
Thank you for purchasing our theme.
need to custom work.
If you need to theme customization or make custom theme or template. Please, you can contact us for this.
Contact